Scanning using Winbox
After you have plotted your node on WIND, and added your 360 degree pictures to the bottom of your Node Page, the next step is to scan your area to see if you have line of sight (LOS) to other nodes.
Contents
BEFORE DOING YOUR SCAN
If not done already, You will need to book the area Scan Kit for your area.
Book your test kit by applying for it in the CORRECT FORUM POST for your area.
TIP : Put a "@" sign on from of the person's name to get a quicker response. e.g @cheaptrick
See the following forum posts for booking info :
GENERAL TEST KIT INFO
OGON's CTWUG TEST KIT
CHEAPTRICK's CTWUG TEST KIT
RMX's CTWUG TEST KIT
NOTE : There are more test kits out there, see the previous page for details.
To do the Scan you will require :
•A Ladder or way to gain access to the roof
•A laptop/notebook to run winbox
•Extention lead to power the POE (power supply for the dish) and the laptop if required
•The CTWUG test kit
GETTING READY TO SCAN
Download WINBOX software from the Mikrotik website.
Plug the POE lead into the ethernet port of the Laptop/notebook
Plug the Flylead from the LHG5 Dish into the POE
Provide power to the POE supply.
Confirm that the power light is on on the dish.
No changes to your network settings should be necessary, as we will later be connecting via the Mac address.
DOING YOUR FIRST SCAN
To do this , you will need a program called WINBOX. Click HERE to download the latest version.
Once the download is finished, you can run the WinBox program (single executable, no installation required.)
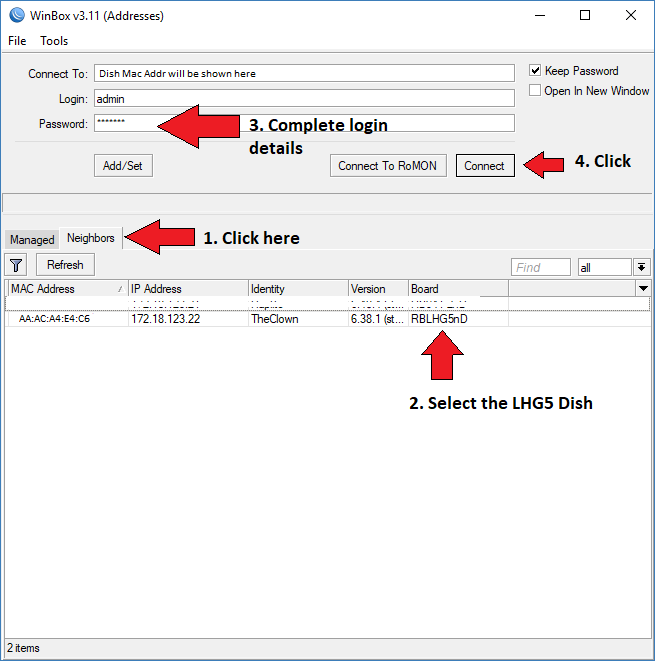
You will see the login screen
1. Click on the Neighbors Tab to see what devices are being picked up.
In the list below the tab, the Mac Address of the Test Dish will be shown.
2. Click on the Mac address to select it
3. Enter the login details for the dish. The Area person from whom you lent the dish should have given you these details when you collected the Test kit.
4. Click Connect to log in to the Test Dish.
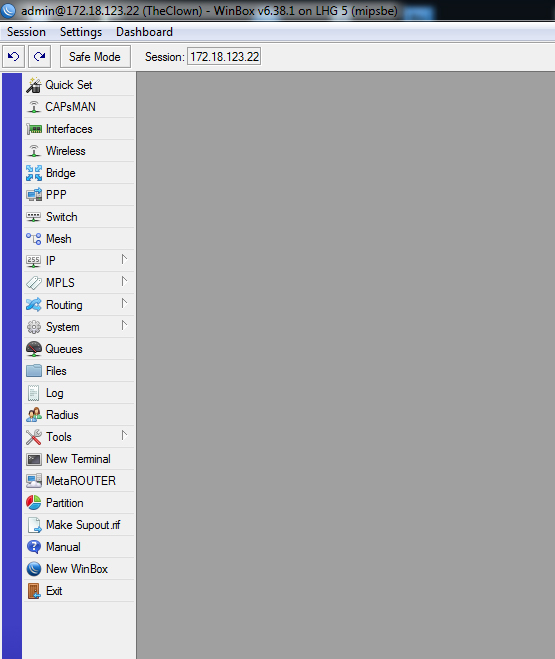
If successful you should now be seeing the main screen in WinBox
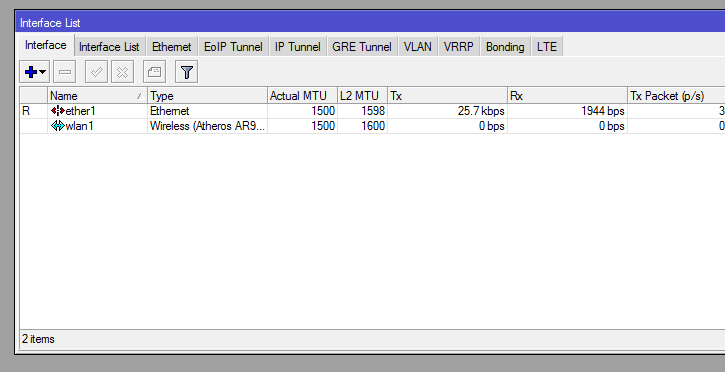
Click on INTERFACES
You will see the Ethernet port of the Dish, and the Wireless "port"
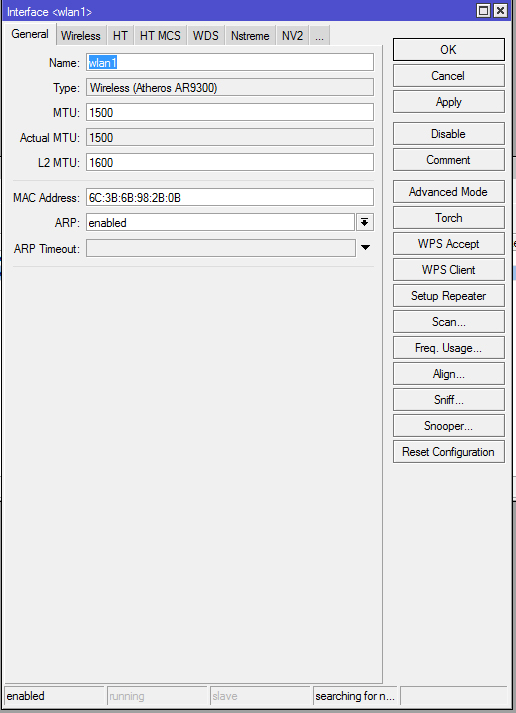
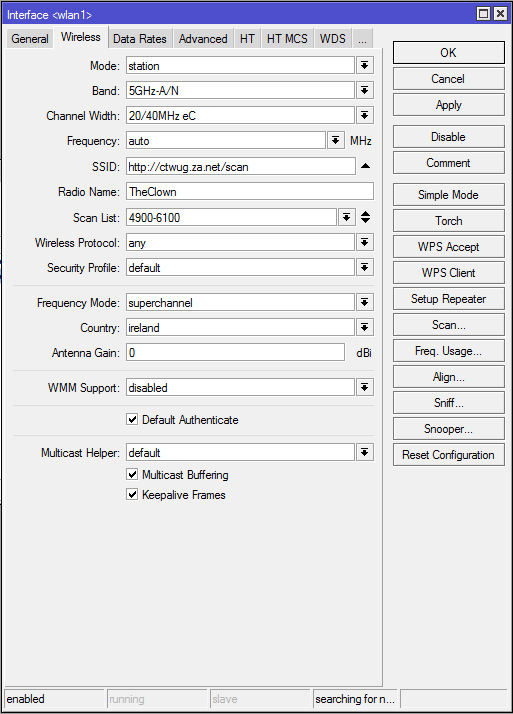
Double-Click the WLAN1 port to see the following screen :
Here you must click on the WIRELESS tab at the top, and the ADVANCED MODE button on the sidebar.
A few changes need to be made here. Set all the values as per the following image :
NB : REMEMBER TO CLICK APPLY WHEN YOU HAVE MADE THESE CHANGES!!
You are now ready to begin scanning...
Click the SCAN button on the right to see the scan dialogue.
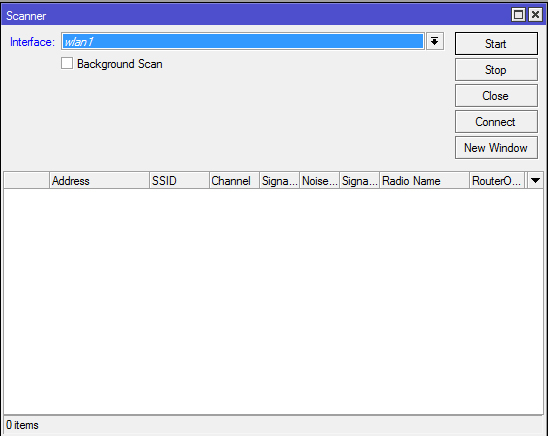 TIP : Click the maximise button here and resize the SSID and Radio Name columns for a better view.
Click START to start your scan while holding the dish in the direction you want to scan, at about the same height you are planning to put your own dish.
It will take about 4-5 minutes for the list to populate fully.
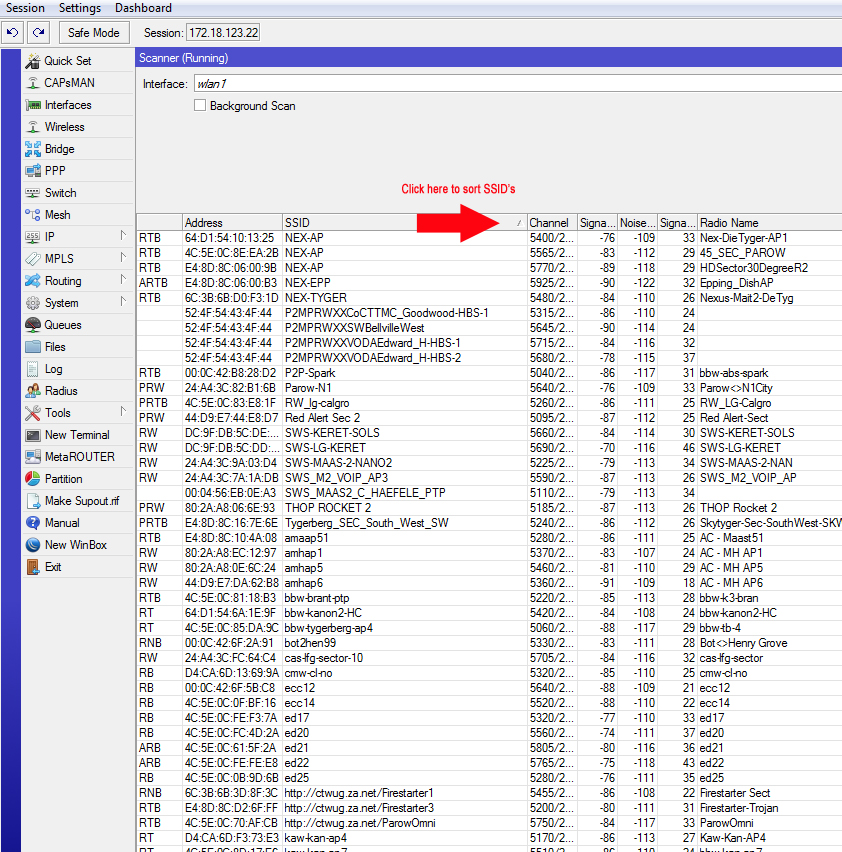
Click on the SSID column heading to sort by SSID, or on Signal Strength Column to find the strongest signal in that direction.
Take a screenshot for later reference, and turn the dish to the nexts compass direction. Repeat with a new scan, wait 5 minutes, and screenshot again.
Do this for all 8 major and minor compass directions. (HINT : Name the screenshots NodeName-Direction.jpg for easy reference later. (e.g THOR-NW.jpg, THOR-S.jpg)
You can also just paste the screenshots into a Wordpad document with clear labels and sort it out later. (SAVE OFTEN - Don't ask me how I know)
ANALISING THE SCAN RESULTS
Obviously you will post the results on the forum for the boffins to look at, but in brief, here is what to look for :
The scan list will show many nodes, access points and wireless systems in the frequency range selected.
You are looking for CTWUG specific SSIDs in the list. Scroll down to the http:// addresses, any links picked up should be there.
If you sorted the scan list by SSID, you should see them all grouped together as shown.
Now that you have the CTWUG nodes, the next important thing is the signal quality.
To be accepted as a good connection, the Signal Strength needs to be better than -60 (A lower number, E.G. -40 is better)
In the example above, ALL the links FAIL quality criteria.
In the following image, the Highlighted link only passed after some fine tuning and dish alignment.
