Difference between revisions of "NAT Tutorial"
| Line 38: | Line 38: | ||
There are 2 ways in accomplishing this. You can use the masquerade function that will translate ALL ips in your PVT network range to 1 ip (which will be the wug ip of your RB) or you can translate a specific Wug ip from the range give to you, to a specific pvt ip of your lan | There are 2 ways in accomplishing this. You can use the masquerade function that will translate ALL ips in your PVT network range to 1 ip (which will be the wug ip of your RB) or you can translate a specific Wug ip from the range give to you, to a specific pvt ip of your lan | ||
| − | *Option 1 - Using MASQUERADE to hide (translate) all ip's on your pvt lan to 1 public (Wug) IP | + | |
| + | *'''Option 1 - Using MASQUERADE to hide (translate) all ip's on your pvt lan to 1 public (Wug) IP''' | ||
| + | |||
[[Image:Mikrotik_nat_howto06.jpg]] | [[Image:Mikrotik_nat_howto06.jpg]] | ||
| + | |||
On the General tab, in the Chain box, we choose srcnat. This will be for all traffic going out via our wlan1 interface, so out interface we make wlan1 | On the General tab, in the Chain box, we choose srcnat. This will be for all traffic going out via our wlan1 interface, so out interface we make wlan1 | ||
Then we go to the Action tab. | Then we go to the Action tab. | ||
[[Image:Mikrotik_nat_howto07.jpg]] | [[Image:Mikrotik_nat_howto07.jpg]] | ||
| + | |||
Here we simply choose the masquerade option | Here we simply choose the masquerade option | ||
| − | *Option 2 - Translate an IP from your WUG RANGE to an internal PVT IP on your lan range | + | |
| + | *'''Option 2 - Translate an IP from your WUG RANGE to an internal PVT IP on your lan range''' | ||
[[Image:Mikrotik_nat_howto08.jpg]] | [[Image:Mikrotik_nat_howto08.jpg]] | ||
| + | |||
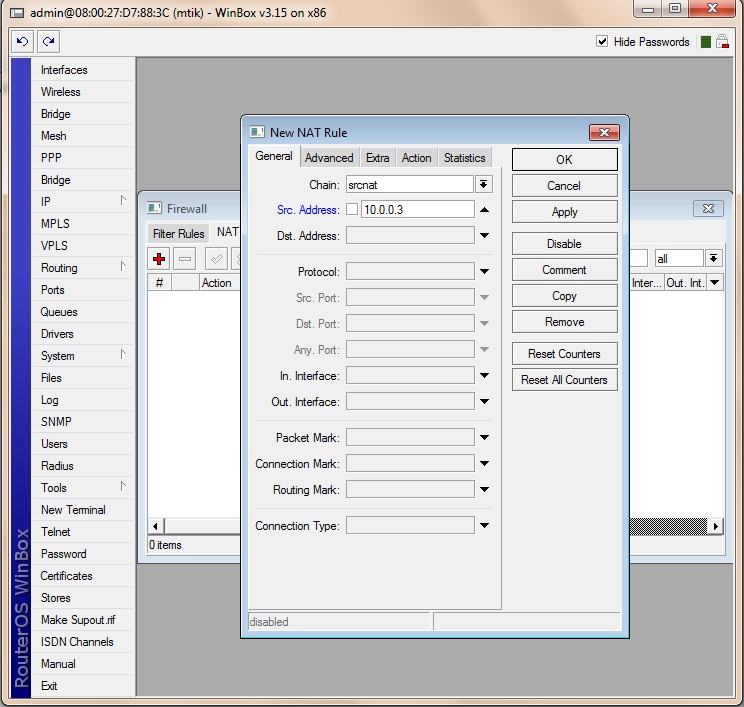
Once again, on the General tab, in the Chain box, we choose srcnat. Now instead of just choosing the outgoing interface, we are going to specify the source ip of the packets that need to be translated. So in Src Address we type the ip of our PVT Address to be translated. | Once again, on the General tab, in the Chain box, we choose srcnat. Now instead of just choosing the outgoing interface, we are going to specify the source ip of the packets that need to be translated. So in Src Address we type the ip of our PVT Address to be translated. | ||
| + | |||
[[Image:Mikrotik_nat_howto09.jpg]] | [[Image:Mikrotik_nat_howto09.jpg]] | ||
| + | |||
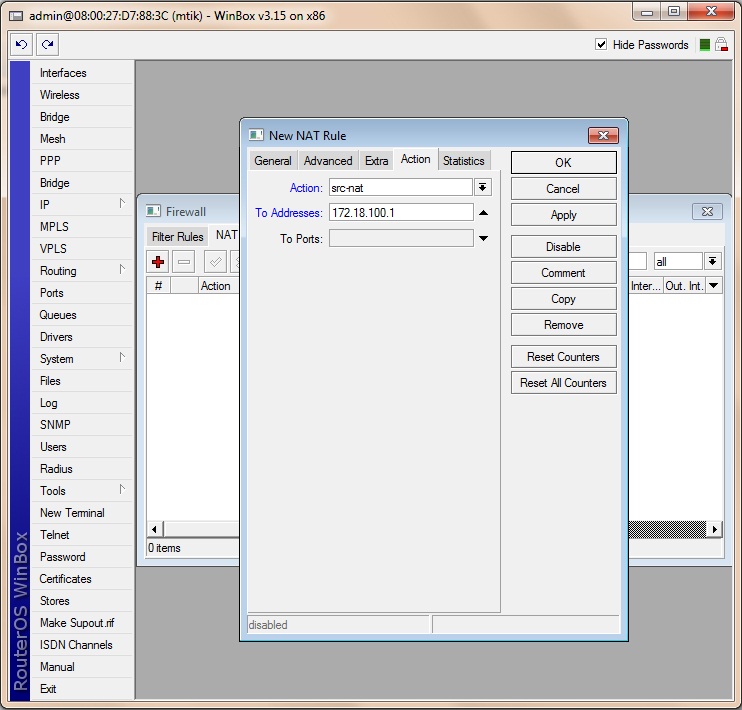
Now instead of masquerading all the ips, now in the Action tab, we make action = src-nat. We specify the to-address as the PUBLIC (WUG) ip to be translated to. | Now instead of masquerading all the ips, now in the Action tab, we make action = src-nat. We specify the to-address as the PUBLIC (WUG) ip to be translated to. | ||
Thats all there is to it ! | Thats all there is to it ! | ||
| + | |||
== Destination NAT (DST-NAT) == | == Destination NAT (DST-NAT) == | ||
| Line 64: | Line 73: | ||
To Forward all ports from the WUG IP 172.18.100.1 to the PVT IP 10.0.0.3 | To Forward all ports from the WUG IP 172.18.100.1 to the PVT IP 10.0.0.3 | ||
| + | |||
[[Image:Mikrotik_nat_howto10.jpg]] | [[Image:Mikrotik_nat_howto10.jpg]] | ||
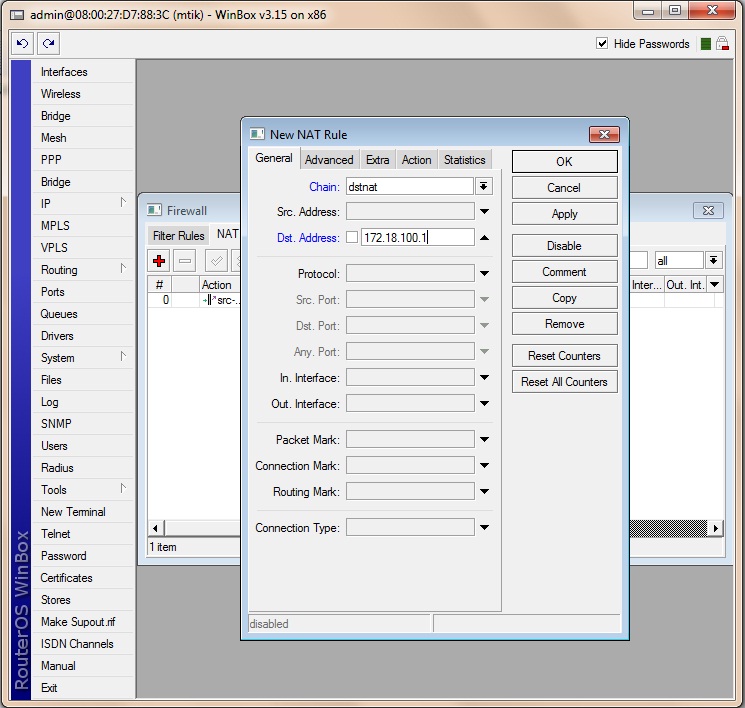
Now in the General Tab, Chain = dstnat. The ip that traffic is destined for is the Public WUG IP, so at dst-address, you need to enter a WUG IP from the range given to you. | Now in the General Tab, Chain = dstnat. The ip that traffic is destined for is the Public WUG IP, so at dst-address, you need to enter a WUG IP from the range given to you. | ||
| + | |||
[[Image:Mikrotik_nat_howto11.jpg]] | [[Image:Mikrotik_nat_howto11.jpg]] | ||
| + | |||
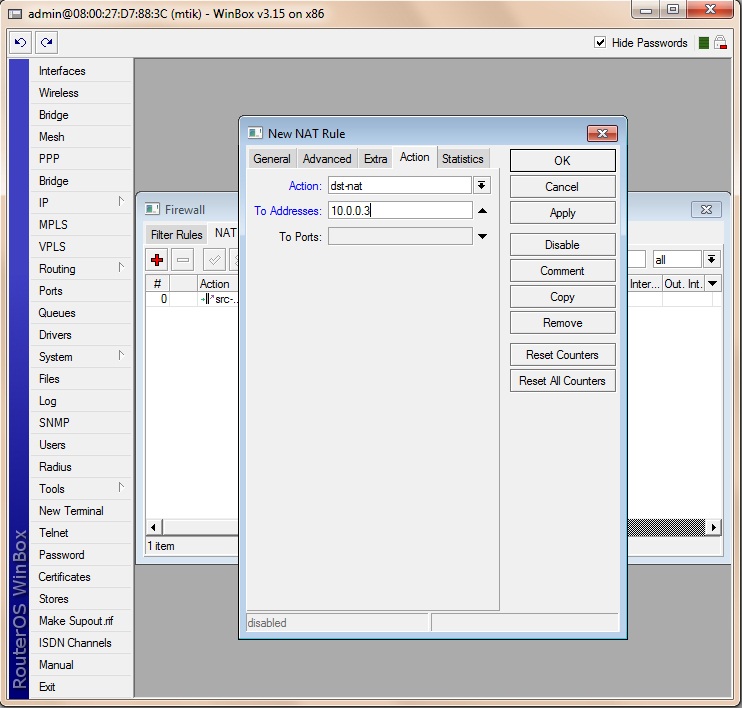
Under the Action Tab, we again choose dst-nat, and then the PVT ip that the address should be translated to at to-address. | Under the Action Tab, we again choose dst-nat, and then the PVT ip that the address should be translated to at to-address. | ||
| + | To Forward only port 21 WUG IP 172.18.100.1 to the PVT IP 10.0.0.3 for an FTP server hosted on PVT IP 10.0.0.3 | ||
| − | |||
[[Image:Mikrotik_nat_howto12.jpg]] | [[Image:Mikrotik_nat_howto12.jpg]] | ||
| + | |||
Same as the previous example, except now we choose the protocol and again we use the dst port. | Same as the previous example, except now we choose the protocol and again we use the dst port. | ||
| + | |||
[[Image:Mikrotik_nat_howto13.jpg]] | [[Image:Mikrotik_nat_howto13.jpg]] | ||
| + | |||
Also the To address is our PVT IP and the port on the PVT lan that needs to be forwarded. | Also the To address is our PVT IP and the port on the PVT lan that needs to be forwarded. | ||
Revision as of 19:18, 21 September 2009
This is a tutorial to explain how to use your own private lan range for network and NAT network address translation This means, for example, that in your private network you can have whatever private IP you want which is then in turn translated to the public network IP (WUG IP) given to you by your WUG Admin. This tutorial can thus be used by wuggers who dont want to change the internal IP addressing of their LAN.
In tutorial we are using the following ips:
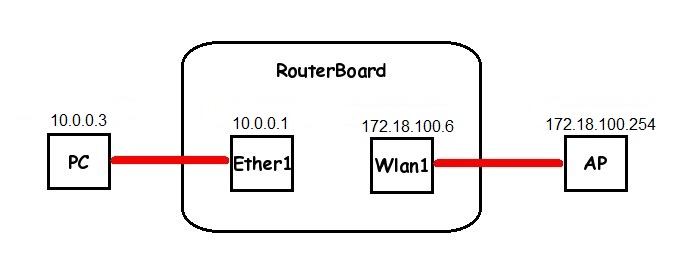
Highsite IP: 172.18.100.254 Wugger RB IP: 172.18.100.6 Wugger Wug Range: 172.18.100.0/29 Wugger PVT Lan Range: 10.0.0.0/24 Wugger PC PVT IP: 10.0.0.3
Source NAT (SRC-NAT)
For Source NAT your PVT IP address will be translated to a Public WUG IP, this so that you pvt ip can communicate with traffic on the public network (Think of it as traffic going out from pvt lan to public lan)
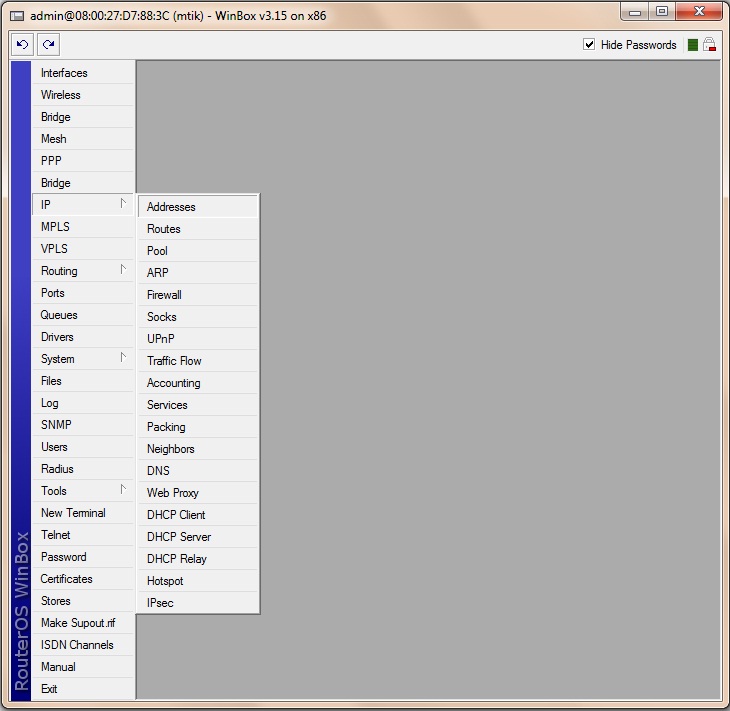
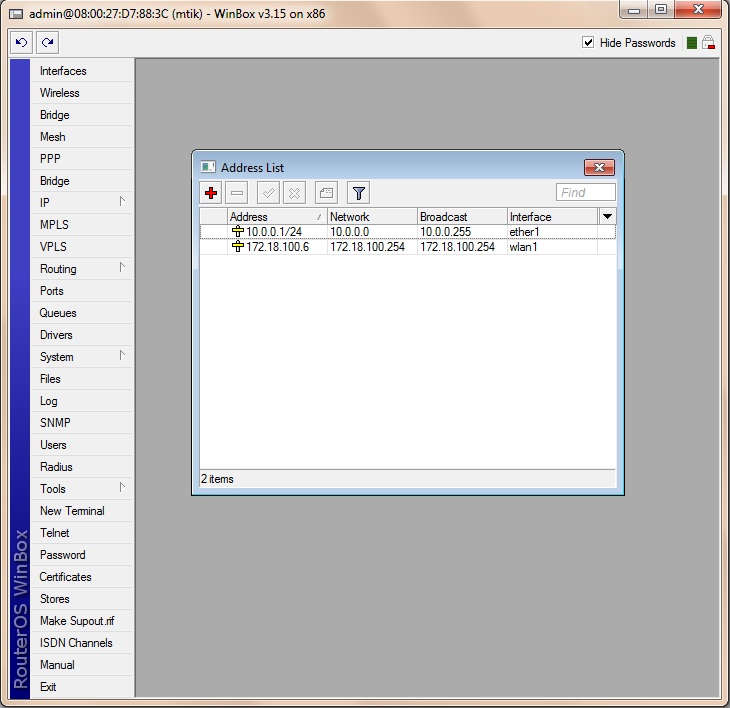
First configure the IP's for your wlan1 (Wireless Wug interface) and eht1 (Ethernet interface)
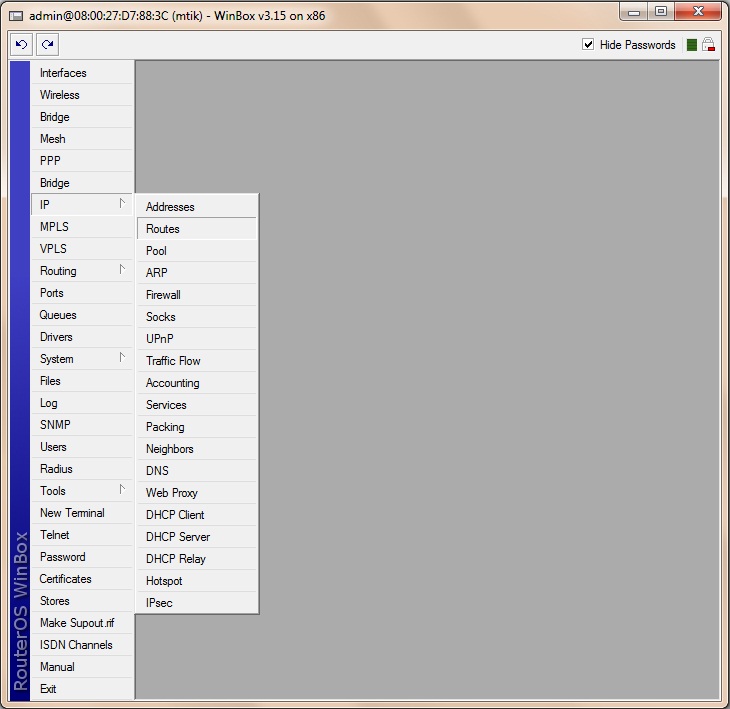
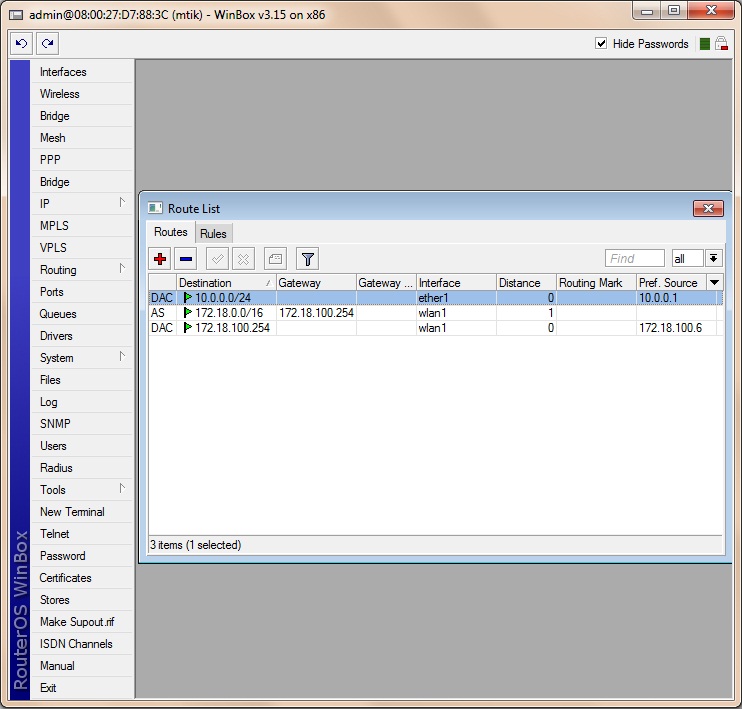
Set your static Wug route of 172.18.0.0/16
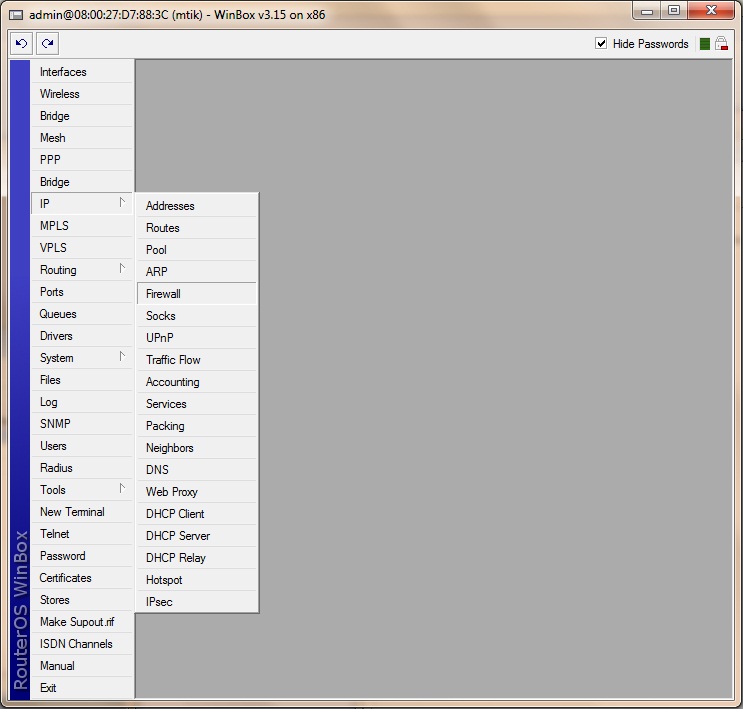
To configure the NAT, go to IP > Firewall and click the NAT tab
First we will configure the Source Network Address Translation setting (SRC-NAT). This will translate your local pvt lan ip (10.0.0.3) to a public (wug accessible) ip.
There are 2 ways in accomplishing this. You can use the masquerade function that will translate ALL ips in your PVT network range to 1 ip (which will be the wug ip of your RB) or you can translate a specific Wug ip from the range give to you, to a specific pvt ip of your lan
- Option 1 - Using MASQUERADE to hide (translate) all ip's on your pvt lan to 1 public (Wug) IP
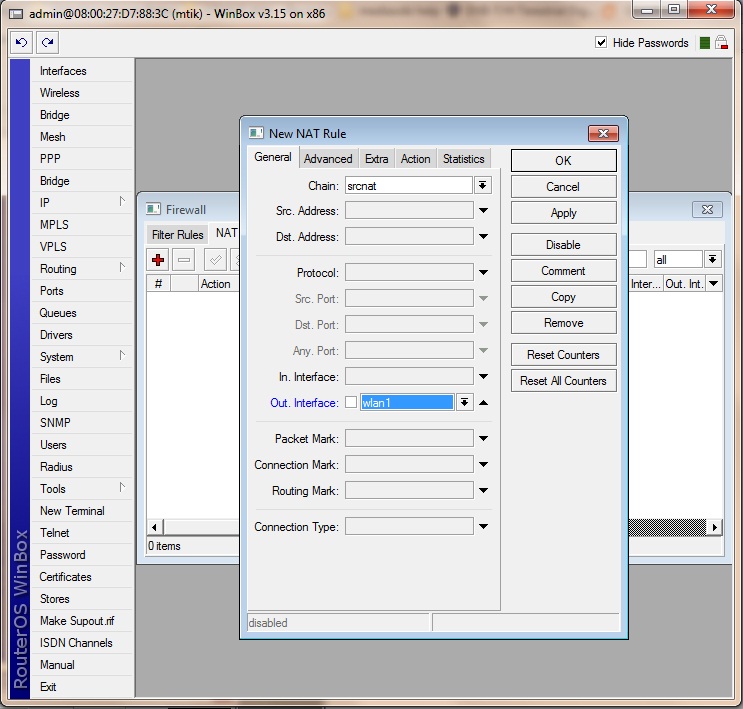
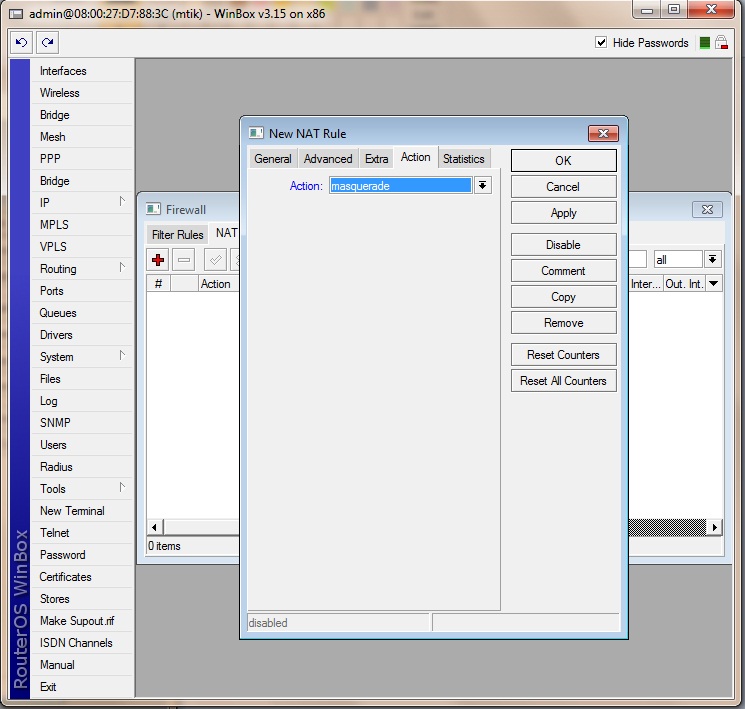
On the General tab, in the Chain box, we choose srcnat. This will be for all traffic going out via our wlan1 interface, so out interface we make wlan1 Then we go to the Action tab.
Here we simply choose the masquerade option
- Option 2 - Translate an IP from your WUG RANGE to an internal PVT IP on your lan range
Once again, on the General tab, in the Chain box, we choose srcnat. Now instead of just choosing the outgoing interface, we are going to specify the source ip of the packets that need to be translated. So in Src Address we type the ip of our PVT Address to be translated.
Now instead of masquerading all the ips, now in the Action tab, we make action = src-nat. We specify the to-address as the PUBLIC (WUG) ip to be translated to.
Thats all there is to it !
Destination NAT (DST-NAT)
For Destination NAT, traffic to a public WUG IP will be forwarded (translated) to your PVT IP address. On some routers this is also known as port forwarding. You can either forward all traffic to a public ip to your ip or you can choose to only forward selected ports to your ip. You can even use 1 public ip and forward different ports to different internal ips. (Like forward port 21 (ftp) to ip 10.0.0.3 and forward port 80 (http) to ip 10.0.0.4.
Once again we go IP > Firewall and choose the NAT Tab
To Forward all ports from the WUG IP 172.18.100.1 to the PVT IP 10.0.0.3
Now in the General Tab, Chain = dstnat. The ip that traffic is destined for is the Public WUG IP, so at dst-address, you need to enter a WUG IP from the range given to you.
Under the Action Tab, we again choose dst-nat, and then the PVT ip that the address should be translated to at to-address.
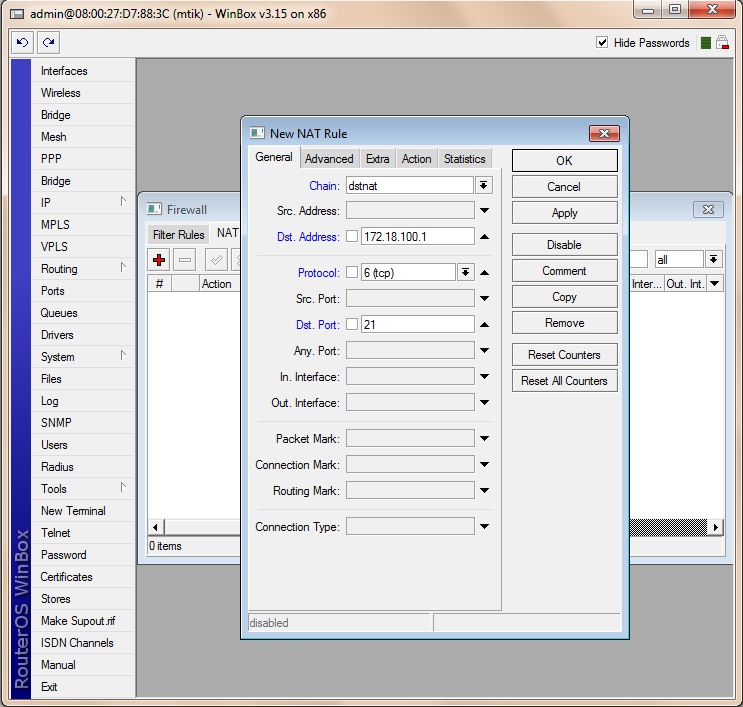
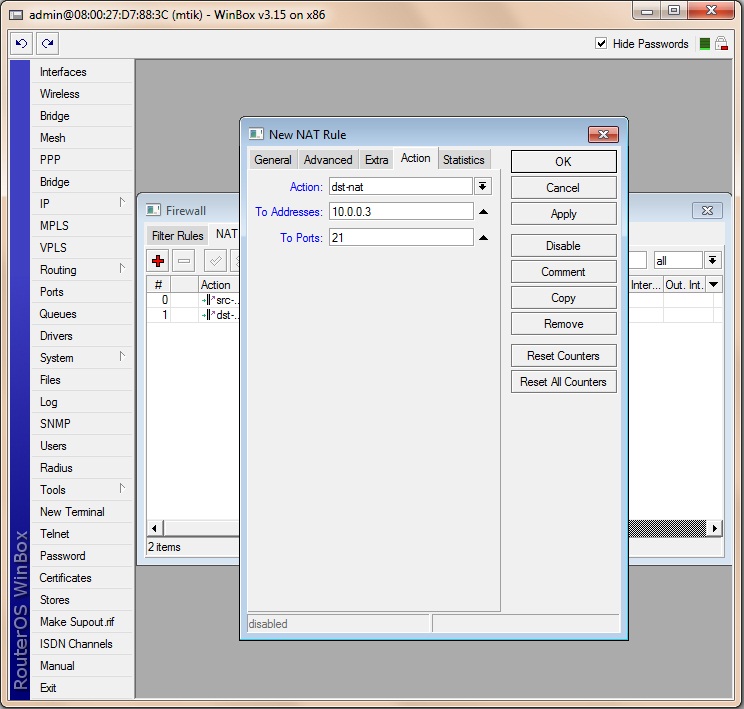
To Forward only port 21 WUG IP 172.18.100.1 to the PVT IP 10.0.0.3 for an FTP server hosted on PVT IP 10.0.0.3
Same as the previous example, except now we choose the protocol and again we use the dst port.
Also the To address is our PVT IP and the port on the PVT lan that needs to be forwarded.
