Difference between revisions of "Node Update"
| Line 1: | Line 1: | ||
== Overview == | == Overview == | ||
| − | This is a quick guide on how to update your node details to show your connection to a High Site (HS) (aka Access Point (AP) aka Sector). Anyone who is a client connecting to | + | This is a quick guide on how to update your node details to show your connection to a High Site (HS) (aka Access Point (AP) aka Sector). Anyone who is a client connecting to a HS should complete these steps once connected. Updating your link details helps to show how full a HS is. Updating your IP details automatically updates the WUG DNS. Additionally you can list your equipment, upload pictures of your site and other useful information. |
These steps assume that you have already created your node in wind. wlan1 refers to the interface you use to connect to the WUG. Generally this is the default, but it could be renamed or be wlan2 etc. | These steps assume that you have already created your node in wind. wlan1 refers to the interface you use to connect to the WUG. Generally this is the default, but it could be renamed or be wlan2 etc. | ||
Revision as of 23:08, 22 August 2012
Overview
This is a quick guide on how to update your node details to show your connection to a High Site (HS) (aka Access Point (AP) aka Sector). Anyone who is a client connecting to a HS should complete these steps once connected. Updating your link details helps to show how full a HS is. Updating your IP details automatically updates the WUG DNS. Additionally you can list your equipment, upload pictures of your site and other useful information.
These steps assume that you have already created your node in wind. wlan1 refers to the interface you use to connect to the WUG. Generally this is the default, but it could be renamed or be wlan2 etc.
Update Link Details
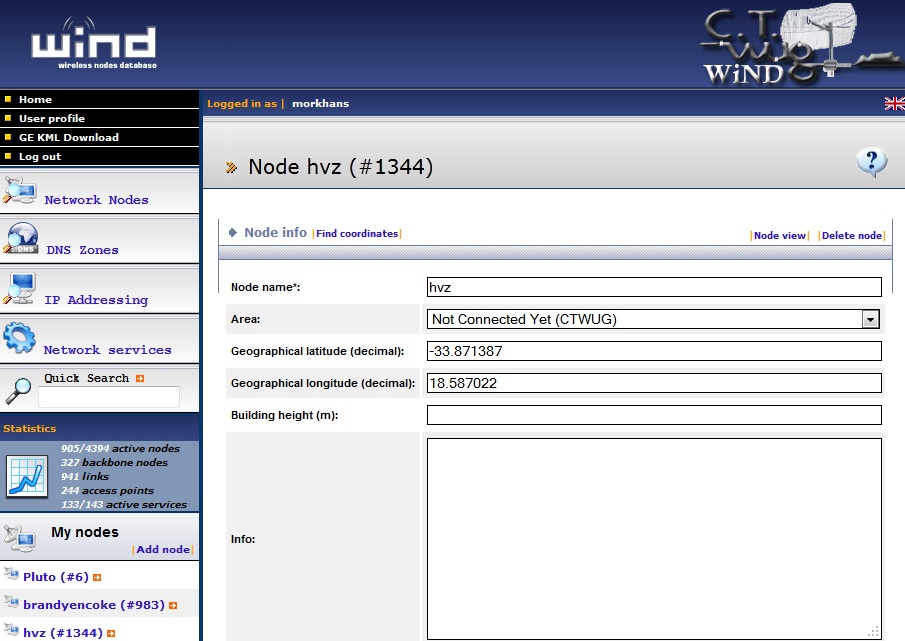
- Login to wind and click on your node. You should automatically be in node edit mode.
- From the Area drop-down select the site that's closest to you
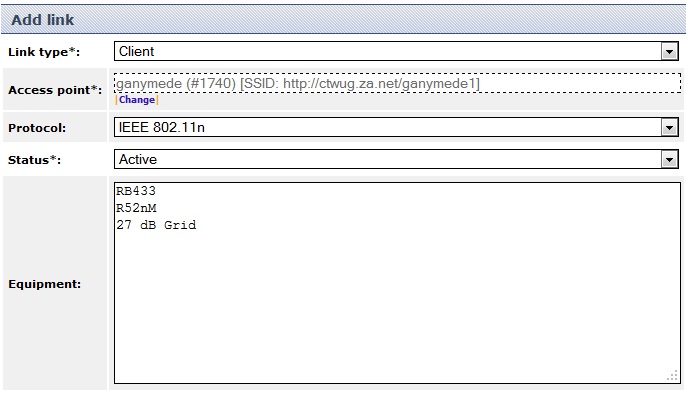
- Scroll down to Links and click Add Link
- Link Type: Client
- Access Point: Click change. You have two options:
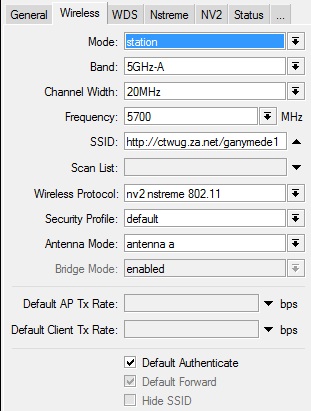
- Login to your RB go Interfaces | wlan1 | Wireless tab and copy and paste the details from SSID
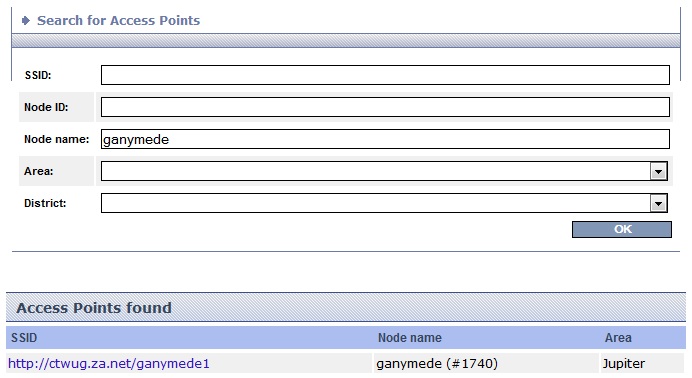
- Search for the site by node name to get the SSID. Click on the SSID to populate the field from your search list.
- Note: Sites often have backbone links, sectors and possibly even more than one sector to which clients connect. Make sure you select the correct interface to help keep things accurate.
- Protocol: You can select it if you know what it is. Typically most newer cards will be IEEE 802.11n
- Status: Active
- Equipment: Again if you have the info, fill it it. It's useful to know if you have an RB that allows for expansion so people can contact you about additional links.
- Example: RB433, R52nM, 27 dB grid
- Info: Anything else you think is useful. Generally I use this for Backbone or Sector information to specify the Protocol (i.e. NV2) and Frequency (i.e. 5700) so clients probably won't use this.
- Scroll down and click OK
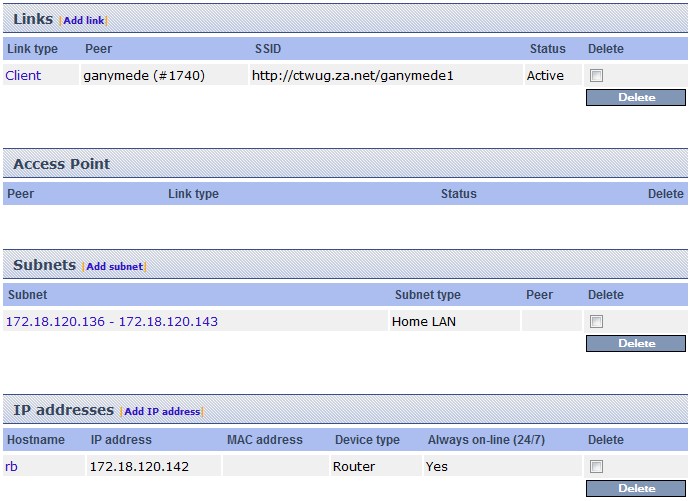
- You will be taken back to the node edit page where you should now see your link listed
Update IP Details
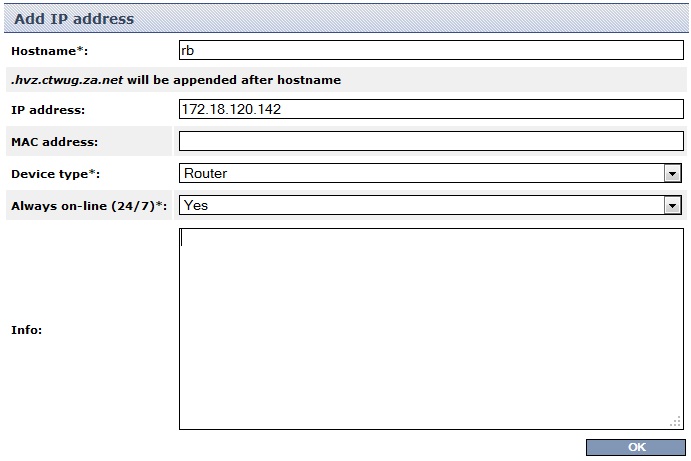
- Scroll down to IP addresses and click Add IP address
- Hostname: rb
- IP Address: This will be the IP of your RB. You can find it in Winbox: IP | Addresses | wlan1.
- MAC Address: can be left blank
- Device Type: Router
- Always on-line (24/7): Yes
- Scroll down and click OK
You can add addition devices as you require
Upload Images
You are strongly encouraged to populate the Node's view page with pictures to help other people gauge your Lign of Sight (LoS) for possible future links. If you are not sure which picture is North, East etc. Look at your node from Google earth and use the compass to help you match your pictures to the direction.
All Done!
When done you node edit page should looks something similar to this:
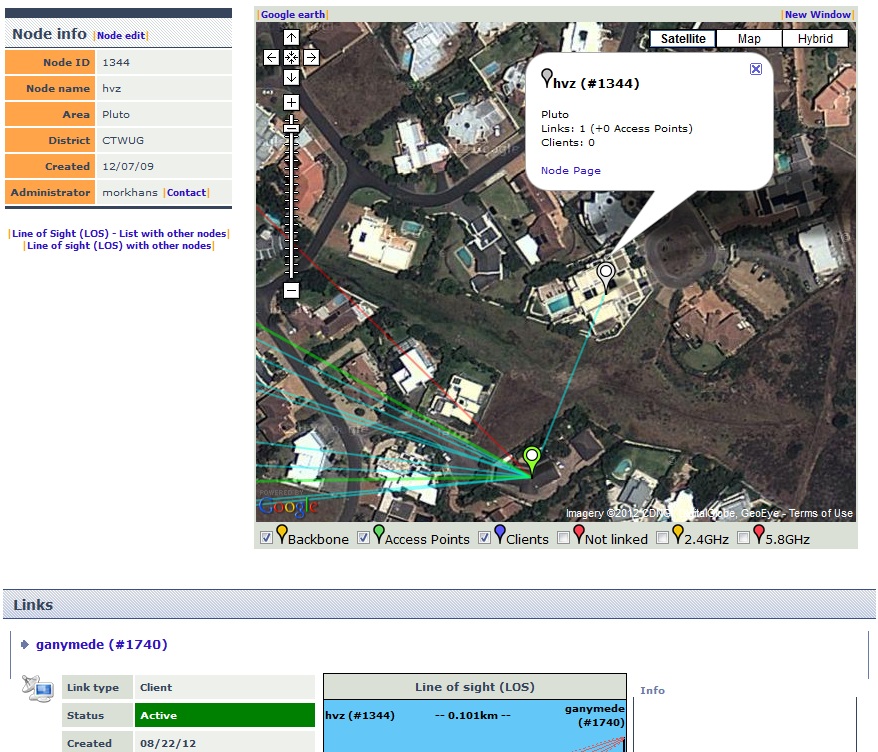
Now scroll to the top and click Node View. Your node view page should show a link connecting you to the High Sight on the Google Maps view as well as a representation of the LoS below.
