Ros3 Split Local International
Info
The following is a guide on how to route traffic across two (or more) ADSL accounts, based on destination IP address.
Setup
ADSL Accounts
First, you need to create your 2 ADSL accounts. For the sake of this demo I will call them "ADSL-LocalOnly" and "ADSL-International"
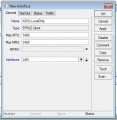
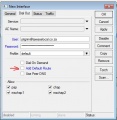
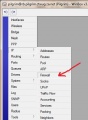
Click on Interface->Add new->PPPoE Client (The little red plus at the top left of the interface window)
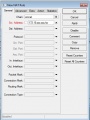
Enter a name and select your Ethernet port (the one that is connected to your ADSL modem) on the General tab. Enter your ADSL user name and password on the Dial Out tab.
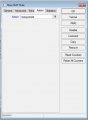
For the local only account, uncheck the "Add Default Route" option.
"Add Default Route" lets your router know that any traffic that it does not know where it should go it must pass on to this interface. So, turn this off for all the ADSL accounts except one.
- ADSL Setup
Interface menu
Add PPPoE Client
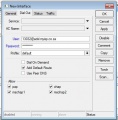
Configure Local only account
Configure International account


NAT
The second step is to allow multiple computers on your network to use the ADSL account on your routerboard. This is called NAT, Network Address Translation.
Click IP->Firewall. On the NAT tab add a new rule (red plus at the top left of the NAT window) Enter you computers network range into Source Address (eg. 172.18.18.0/28) on the General tab. On the Action tab choose "masquerade" action.
Do this for all your ADSL accounts you plan to share.
- NAT Setup
IP Firewall Menu
NAT Screen
NAT General
NAT Action


Routing
The last step is to tell your router what traffic needs to go over what ADSL account.
Remember, any traffic that it does not know what to do with will go over the account that has "Add Default Route" selected.
So, all you need to do is tel it what to send over the LocalOnly account. Manually adding 1400 entries will take a while, so rather add it via the terminal.
The format of the command looks like this:
/ip route add dst-address=17.255.48.0/23 gateway=ADSL-LocalOnly
/ip route add dst-address=32.106.152.0/24 gateway=ADSL-LocalOnly
/ip route add dst-address=32.106.153.0/24 gateway=ADSL-LocalOnly
/ip route add dst-address=32.107.9.0/24 gateway=ADSL-LocalOnly
/ip route add dst-address=32.238.152.0/24 gateway=ADSL-LocalOnly
.
.
.
My router uses auto-complete, so pasting that into it does not work. I had to shorten it to:
/ip r a ds 17.255.248.0/23 g ADSL-L
/ip r a ds 32.106.152.0/24 g ADSL-L
/ip r a ds 32.106.153.0/24 g ADSL-L
/ip r a ds 32.107.9.0/24 g ADSL-L
/ip r a ds 32.238.152.0/24 g ADSL-L
.
.
.
Here is a text file with all the routes I use: Media:Localroutes.zip
I modified the data file that RouteSentry uses.
- Routing
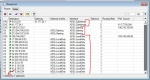
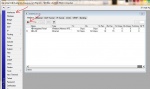
Route List
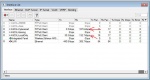
Split in action


Gaming
If you are into online gaming you can extend this method to split all your online gaming traffic onto an expensive unshaped or semi shaped account.
Simply create another ADSL account and route the game servers traffic through that account.
You can use the Torch function on your International ADSL interface to see where traffic is going while you game, then set up a route for that traffic.
Same can be applied to VoIP and other latency dependent applications.