Difference between revisions of "Setting up WugDC++ version 3.0+"
| Line 24: | Line 24: | ||
'''Step 1 - Download the Client'''<br> | '''Step 1 - Download the Client'''<br> | ||
| − | Download the new CTWUG WugDC++ Client version 3.0 from here and install by following the on-screen instructions.<br> | + | Download the new CTWUG WugDC++ Client version 3.0 from here and install by following the on-screen instructions.<br><br> |
__NOTOC__ | __NOTOC__ | ||
Revision as of 18:52, 5 May 2012
|
This page is still under construction while the new client is being finalised. Pictures will be added soon.
Step 1 - Download the Client
Download the new CTWUG WugDC++ Client version 3.0 from here and install by following the on-screen instructions.
|
Step 2 - Run the Client
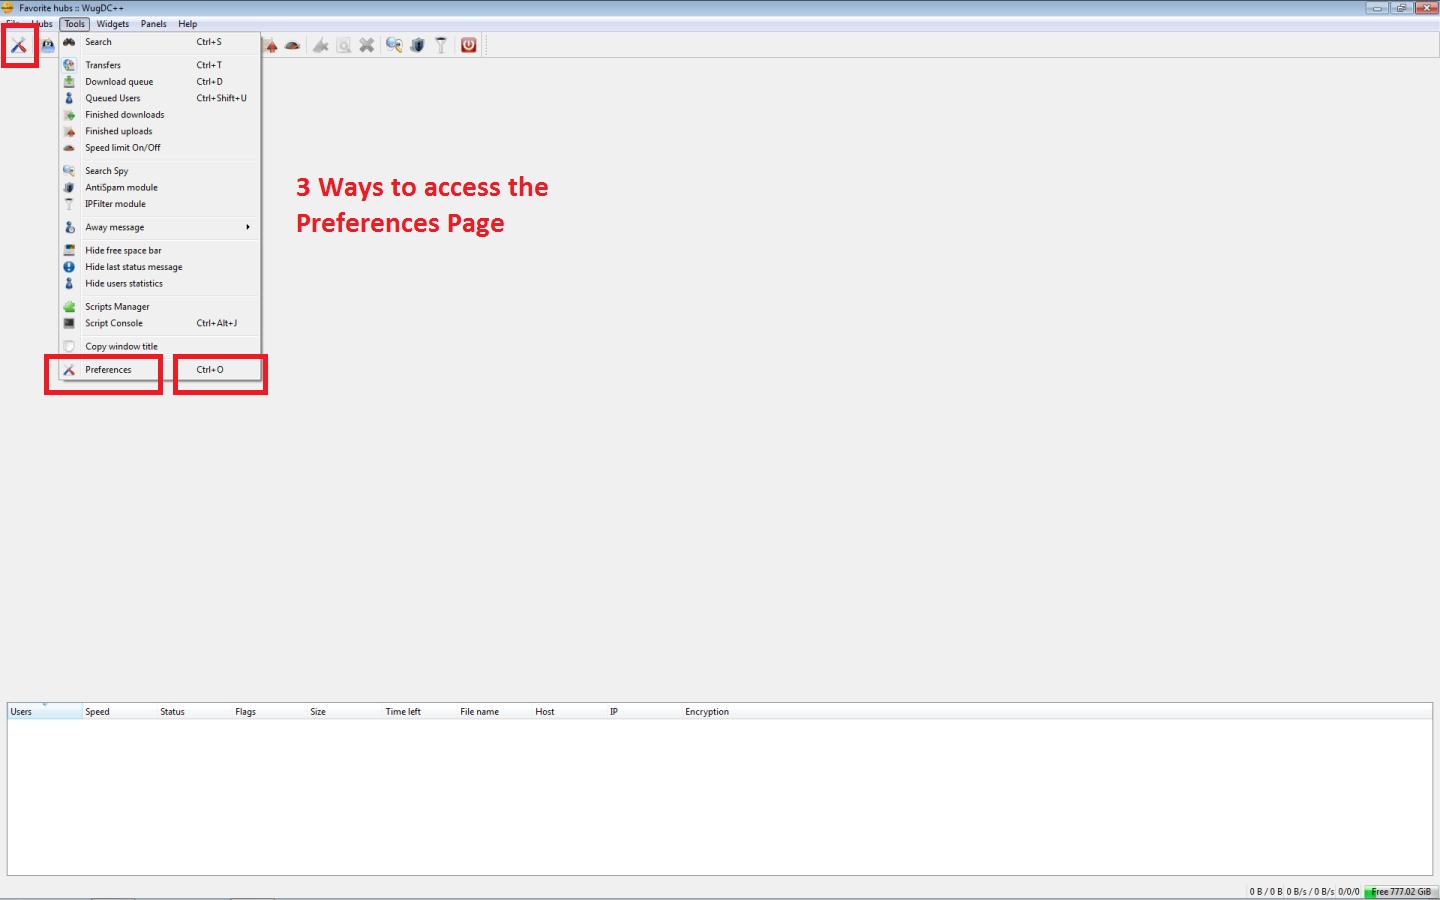
Upon first run you should be taken to the Preferences window automatically.
If you are not, you can access it via the Tools -> Preferences menu, the Preferences toolbar button (first one on the left), or by pressing Ctrl+O.
Step 3 - Settings
There are a number of settings that can be changed to customise WugDC++ to your liking. The important ones are as follows:
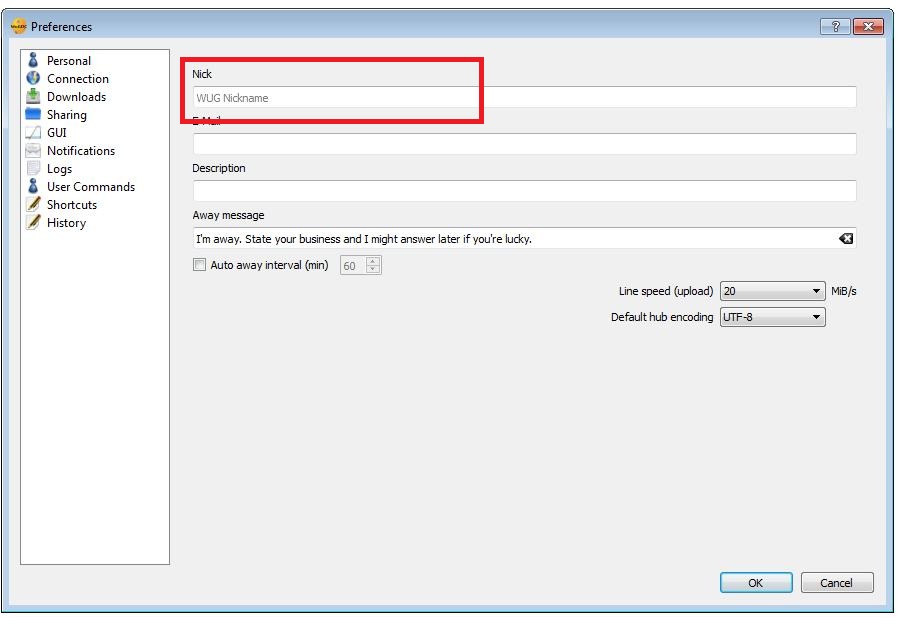
Personal Page
Nick: Your CTWUG nickname
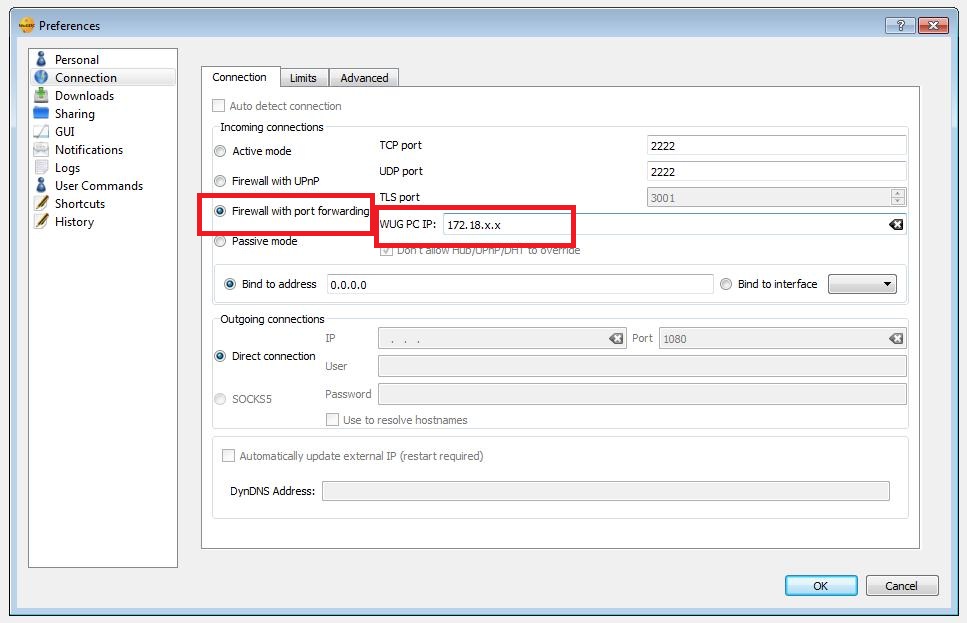
Connection Page -> Connection Tab
Incoming Connections: Firewall with Port Forwarding is the best choice for the majority of wuggers, but you may need to edit this in a few cases.
WUG PC IP: The WUG IP address of the PC you are currently setting up.
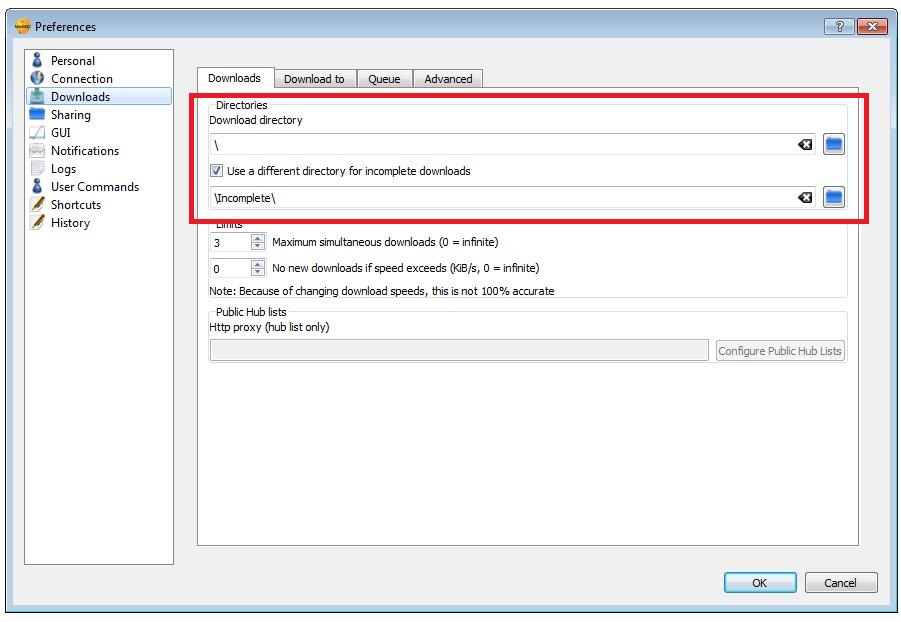
Downloads Page -> Downloads Tab
Download Directory: The directory where you want to store files downloaded via WugDC++
Incomplete Directory: The directory where WugDC++ will store incomplete downloads before moving them to your download directory (can be disabled).
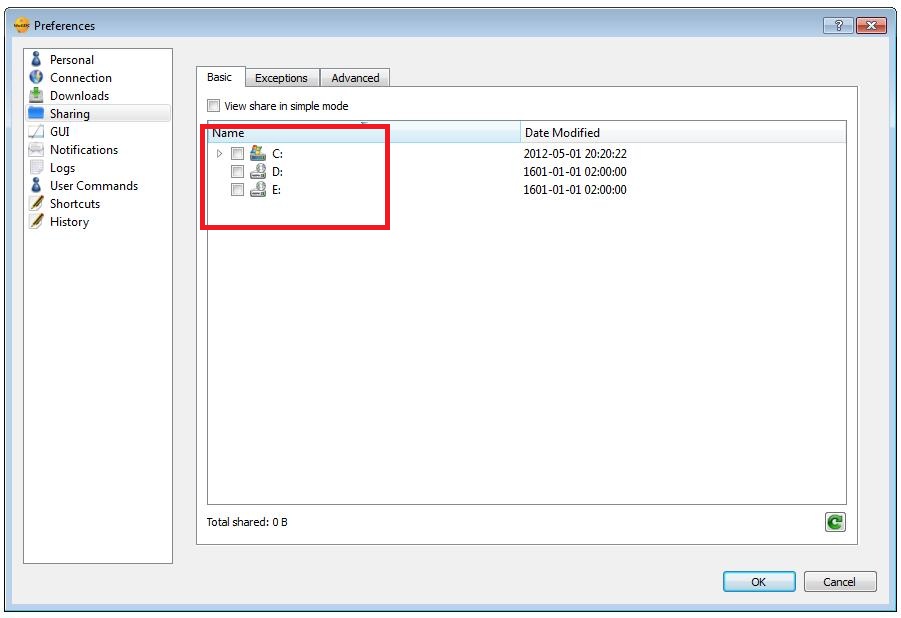
Sharing Page -> Basic Tab
Select the folders you would like to share with WugDC++
Step 4 - Add the CTWUG DC Hub
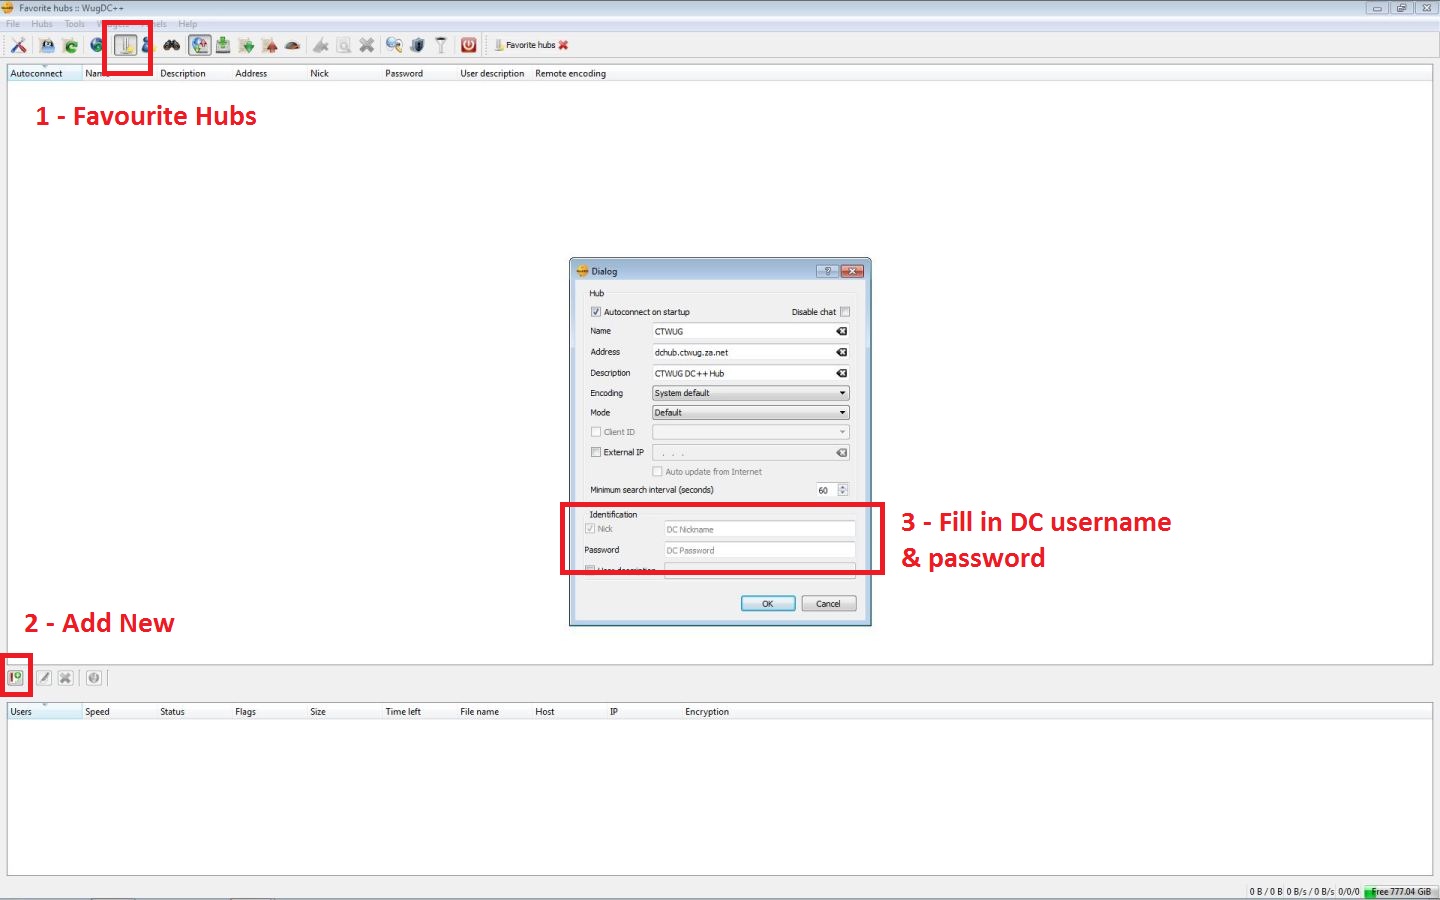
Open your Favourite Hubs page via the Hubs -> Favourite Hubs menu, the Favourite Hubs toolbar button (fifth from the left), or by pressing Ctrl+H.
Use the Add New button on the bottom left to add a new hub.
Step 5 - Configure the Hub
The majority of the CTWUG DC Hub details have already been pre-configured, and you only need to fill in the following:
Identification -> Nick: Your DC username
Identification -> Password: Your DC password
Step 6 - Join the Hub
Once the hub has been added to the list, simply double-click on it (or right-click and Connect) to join the CTWUG DC Network.
Step 7 - Enjoy!