Internet and WUG Routing
Once your initial connection to the High Site has been established and your new RB is communicating properly with the AP, you now need to be able to access the network from you PC whilste maintaining Internet connectivity. Most people already have an existing network e.g workgroup connected with a switch - in most cases an ADSl router from an ISP or purchased from any retail computer shop that has been configured to connect you to the internet. However, the minute you installed and connected your RB to your existing network the scenario has changed. This means that there will be one network (your internal LAN) that needs to communicate with 2 dis-similiar networks namely the internet and CTWUG Lan (172.18.0.0) all at once.
Since your computer is not capable of routing traffic to the internet and the wug all together, we have to join up the 2 routers/gateways i.e ADSl and WUG RB and have them do all the communicating and sorting of traffic. This is called routing.
Scenario Configs:
WUG IP Range: 172.18.117.134/29 WUG Subnet mask: 255.255.255.248 AKA /29
ADSL Router IP: 192.168.0.1 Subnet Mask (internal lan): 255.255.255.0
Please note that this guide was formulated using the following hardware: Sextant Mikrotik RB via Winbox, Windows 7 PC, and a Netgear DGN1000 ADSL Router. Please note that all menu structures and commands and/or formulas are not absolute as different hardware and software configurations may yield different methods to achieve the end result described on this page.
Rule of thumb is that the last IP in the IP range provided by your AP admin must be you RB's IP hence, 172.18.117.134. First we have to put your adsl router on the same IP range of the WUG. We will use the last available IP of your range i.e. 172.18.117.133
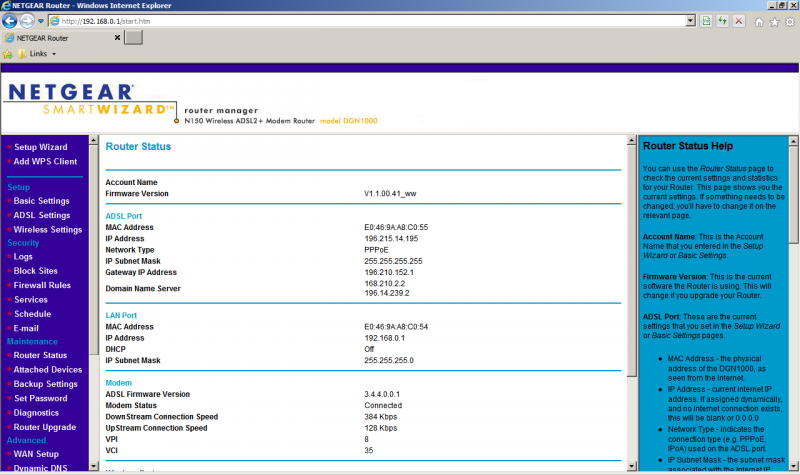
1. Open your internet browser and type in your adsl routers IP address -> 192.168.0.1, then press ENTER.
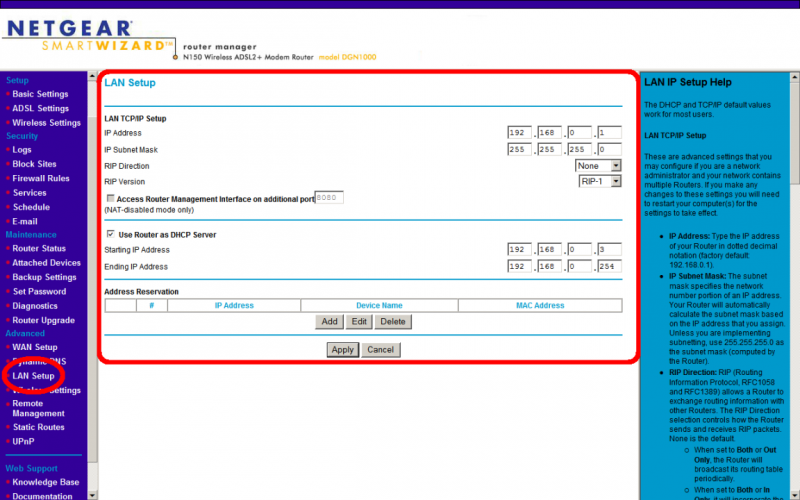
2. Now locate the LAN configuration Page, for the netgear router click on the link called Lan Setup. the page will display the Ip address and subnet mask of the router. Dependeing on your brand and model router it may also display th DHCP settings on the same page.
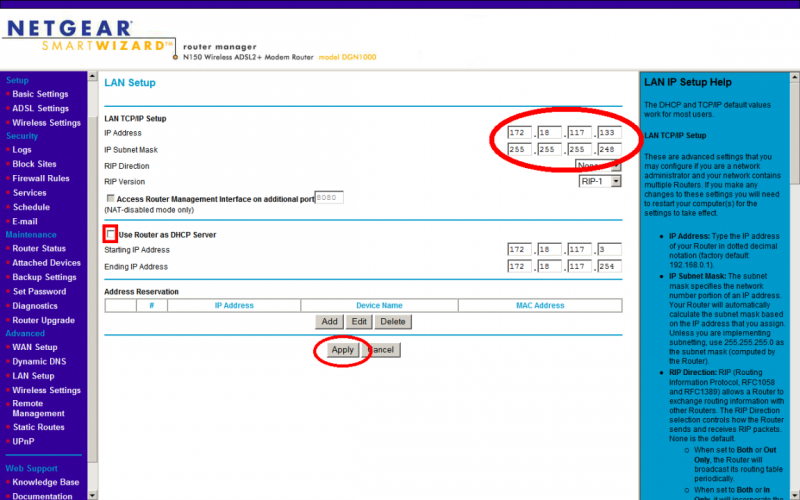
3. Click in the IP Address block and change the IP address from 192.168.0.1 to 172.18.117.133. Also change subnet mask from 255.255.255.0 to 255.255.255.248.
4. Disable the DHCP server altogether. in this case one has to merely un-tick the box called "Use Router as DHCP Server"
5. Once you have done the neccessary changes click Apply at the bottom of the page.
Please note once you do this you will intern loose connectivity to the router as your PC will no longer be on the same network range as the adsl router. To resolve this we need to give your PC a static IP from the WUG IP RANGE. Since the range allows for only 5 usable IP addresses, 2 have already been used namely, wug RB 172.18.117.134 and ADSL router 172.18.117.133.
So I have chosen to use the follwing IP configs for the PC.
IP Address: 172.18.117.131 Subnet mask: 255.255.255.248 Default Gateway: 172.18.117.133
Primary DNS: 172.18.117.131 Secondary DNS: May be left blank OR use 172.18.1.1
If you do not know how to change your PC's Ip address please continue reading the instructions below otherwise skip to Step 16.
6. To change your PC IP Address, left click on the small computer in the system tray (windows vista/7) next to the clock and left click on "Open Network And Sharing Center."
ALTERNATE OPTION
Click on the START button on the task bar and type Network And Sharing Center in the search box. Usually it will be the first link listed.
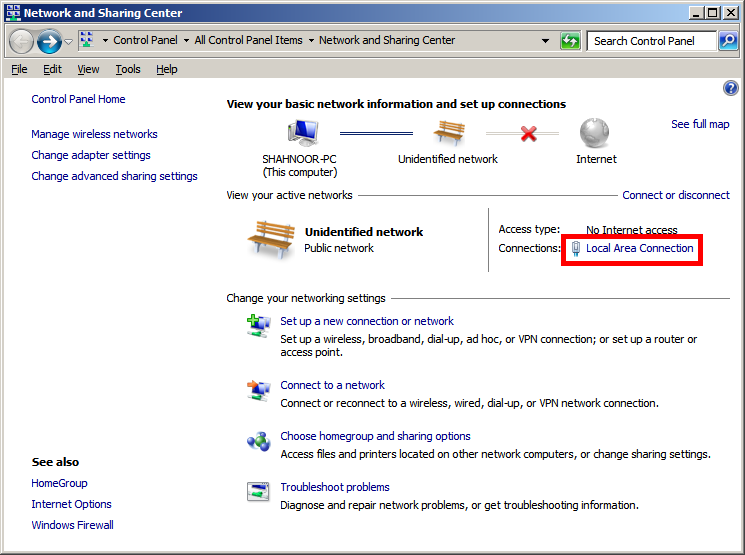
7. Once the Network And Sharing Center is open you will be displayed with the home page showcasing all network connections. Usually the first/default network adapter will be called Local Area Connection.
8. Hover your mouse over the name Local Area Connection and left click on it.
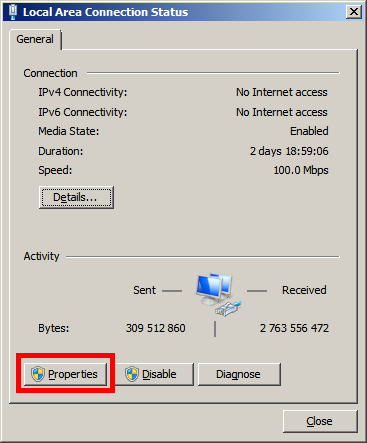
9. A new status dialog box will open displaying all the details of that specific network adapter.
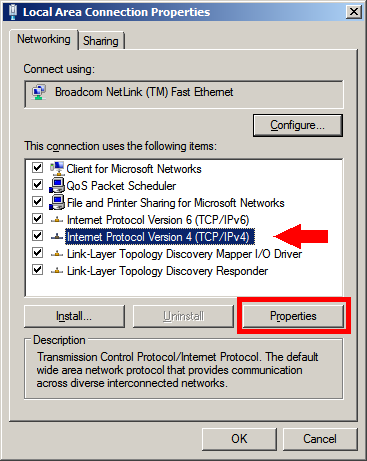
10. Left Click on the Properties button, and another properties dialog box will open displaying all the properties of that specific network adapter.
11. Use your mouse and highlight Internet Protocol Version 4 (TCP/IPV4).
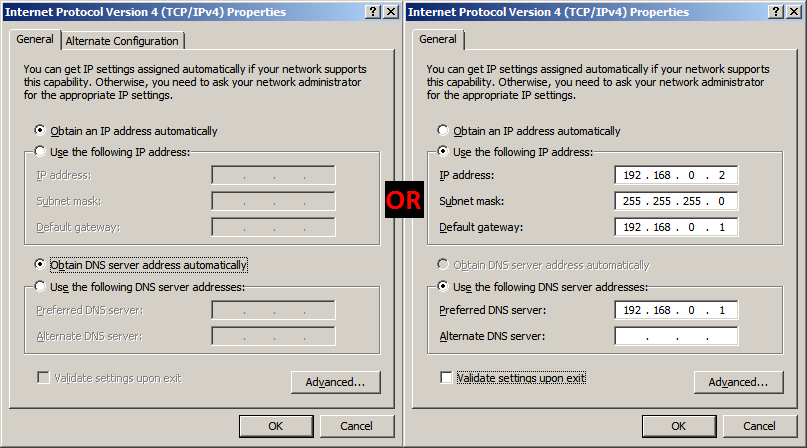
12. Once more left Click on the Properties button. this will open another dialog box displaying the adapters current IP configuration state.
The blocks on the page will either be grayed out meaning that it was recieving an Ip Address from the ADSL router or it might be white with an IP address in each block.
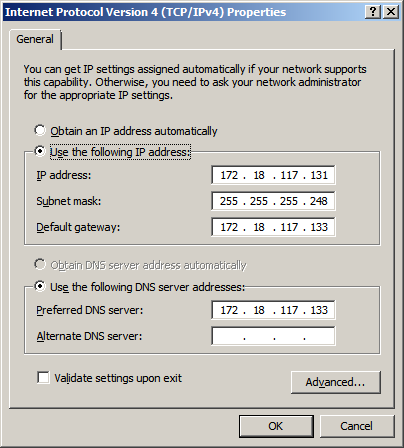
13. If DHCp was enabled, you will need to click on the two radio buttons namely "Use The following IP Address" and "Use the following DNS Server Addresses"
Fill in the information in their respective blocks as shown below.
IP Address: 172.18.117.131 Subnet mask: 255.255.255.248 Default Gateway: 172.18.117.133
Primary DNS: 172.18.117.131 Secondary DNS: May be left blank OR use 172.18.1.1
14. Once completed, click OK, then OK and close. This will activate the IP settings you just entered into the system.
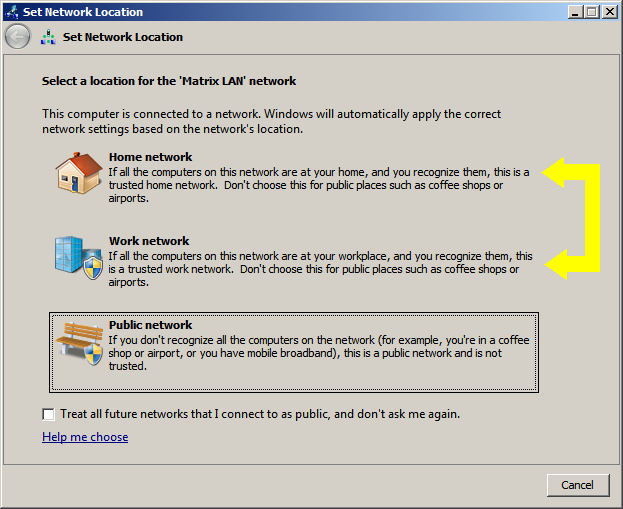
15. If you are displayed with a popup dialog box requesting you to Set Network Location, choose either HOME or WORK. Do not choose Public as this will block essential network traffic.
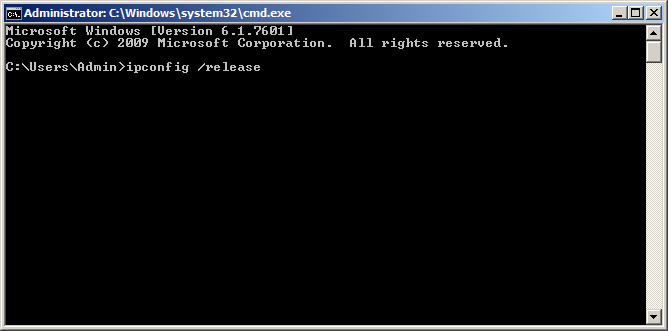
16. Once you have changed the IP adress you need to refresh the LAN connection. This wil be done by clicking Start > Type cmd and click on the link called cmd.exe or Command Prompt. This will open a black box on the screen.
17. In there type "ipconfig /release" without the quotations and press ENTER. Wait for it to complete.
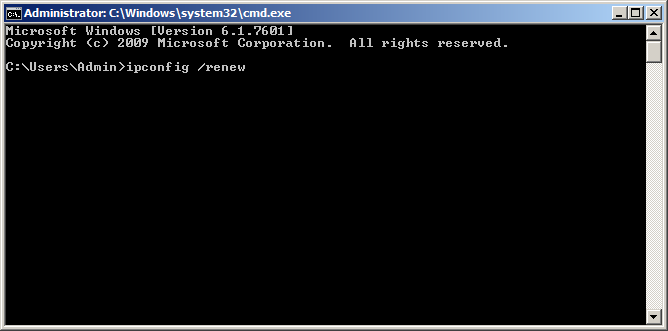
18. Now type "ipconfig /renew" without the quotations and press ENTER. Wait for it to complete.
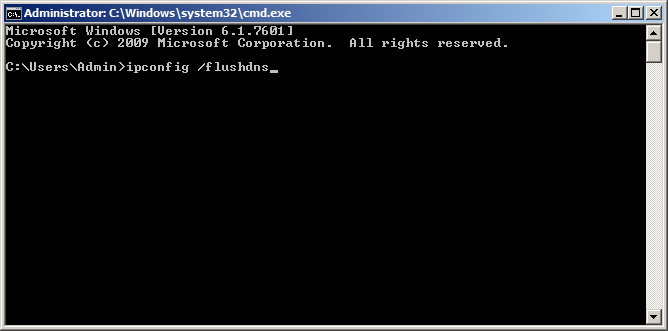
19. Now type "ipconfig /flushdns" without the quotations and press ENTER. Wait for it to complete.
We now need to tell the ADSL router where to send all wug traffic to and we also need to tell the WUG RB where to send all traffic to. Basicly what we are doing is intriducing the 2 routers to each other. This is done with static routes.
First we are going to tackle the ADSL router. NB: This can be done either way there is no specific order to which router gets configured first.
20. Open your internet browser and type in your ADSL router's Ip address, this was initially 192.168.0.1, NOW it is 172.18.117.133.
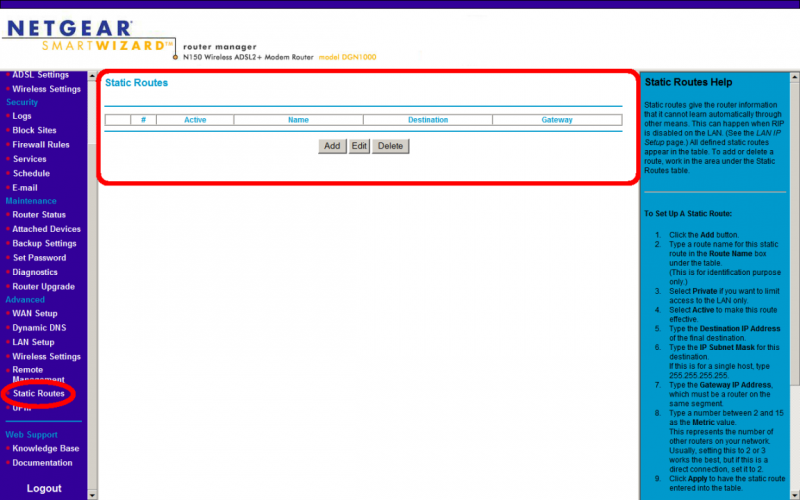
21. Generaly the page you are looking for will be called Routes or Static Routes. In some router menu structures it might be under a section called Configurations or Advance Configurations.
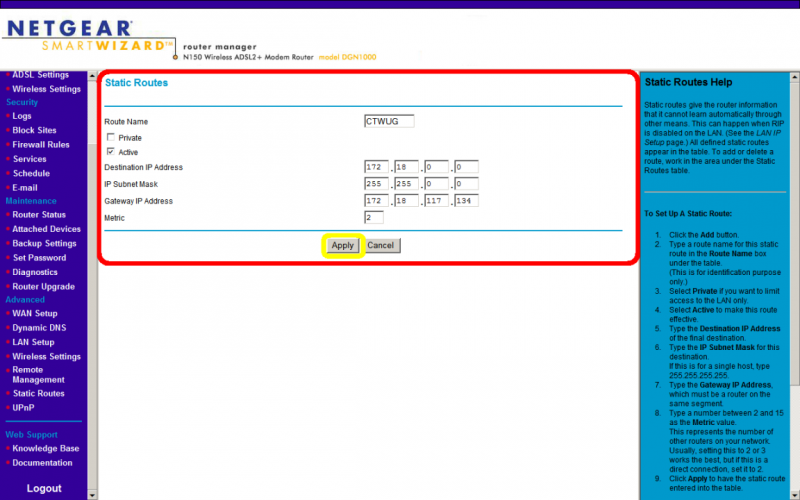
22. Click on the Add button and fill in the necassary information as shown below and click on Apply:
Name: CTWUG (This can be anything you wish) Active Box: Ticked (if applicable) Destination Address: 172.16.0.0 IP Subnet Mask: 255.240.0.0 Gateway IP Address: 172.18.117.134 (ignore what it says in the below screenshot and use the info)
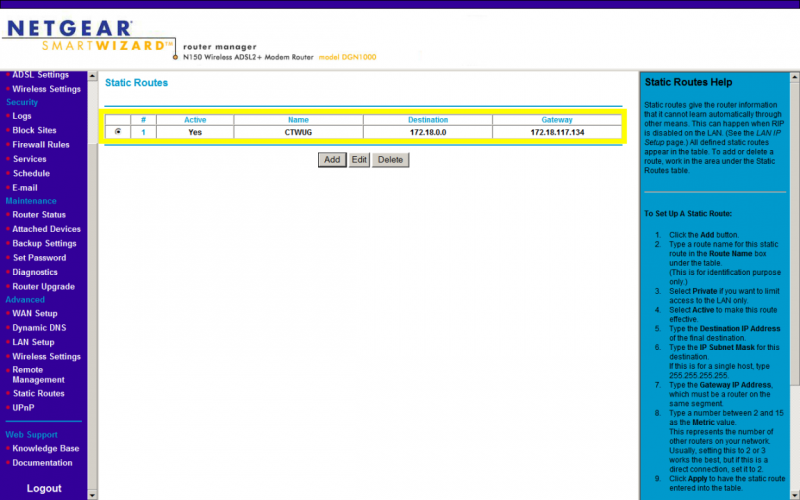
If you filled in the information correctly it will show-up on the static routes page. (ignore what it says in the below screenshot and use the above info)
You have now completed the neccessary configuration of your ADSL Router and one PC. Lets move onto the configurations of your RB.
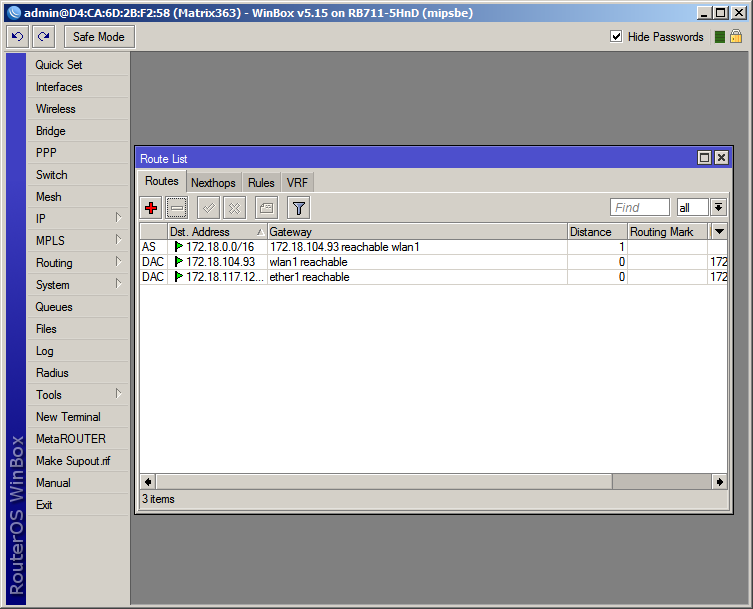
23. Open Winbox and logonto your RB. Click on IP > Routes. Here you will see a list of default routes required to esablish proper connectivity to the WUG network. If they do not exist please refer to Wiki page PTP Setup or contact your AP Admin. Earlier you added a static route in the ADSL router telling it where the WUG RB is. Now we need to do the same and tell the WUB RB where to send all traffic 0.0.0.0 to, namely the ADSl router (172.18.117.133).
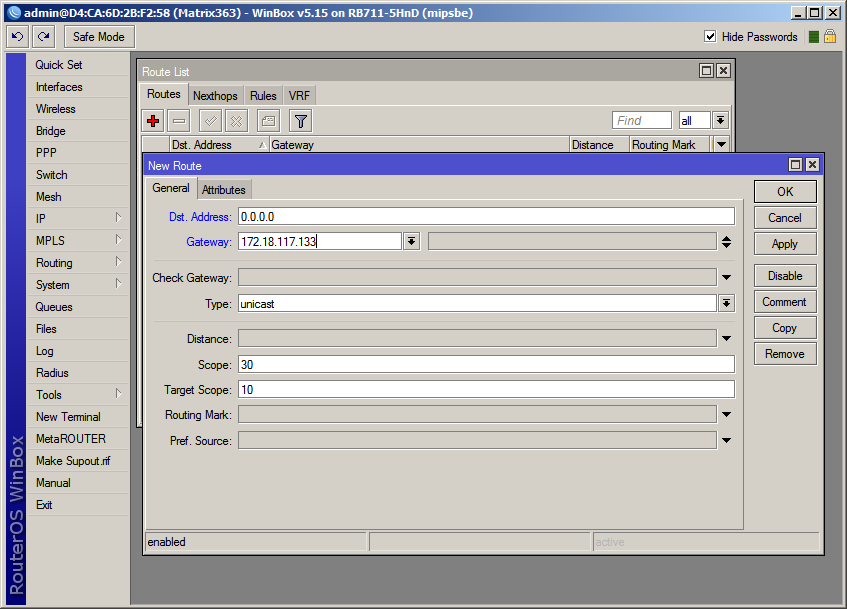
24. Click on the + sign. A new dialog box will open.
25. Fill in the necessary information as shown below.
Dst. Address 0.0.0.0 Gateway: 172.18.117.133
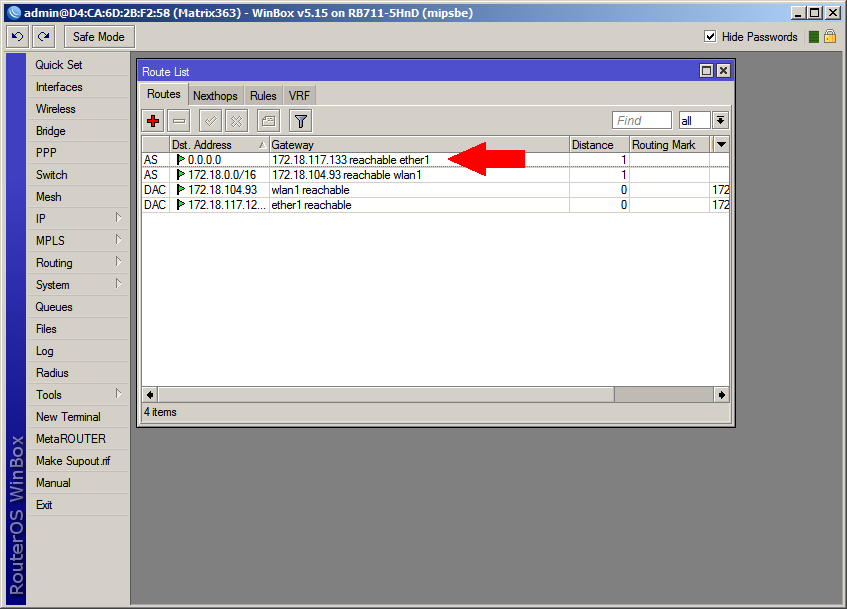
Once complete, click on Apply And OK. If all was entered correctly you should see a new addition to the list.
Thats it! You have just configured your WUG RB and ADSL to work together with one IP address.
For alternate configs such as NATTING IP Addresses and Port Forwarding, please visit the Wiki Page = HowTo NAT IP Addresses.
For all queries, comments, suggestions and troubleshooting please log onto any of the CTWUG-IRC Channels.
Happy Wugging!
