Difference between revisions of "Getting Connected"
m (→Wireless Hardware) |
(→Wireless Hardware) |
||
| Line 7: | Line 7: | ||
* Come visit us on [[CTWUG_IRC|IRC]] to discuss your scenario - from how high your house is to how far away you are from the highsite. <font color="red"><b>Do not buy any equipment before consulting us first.</b></font> | * Come visit us on [[CTWUG_IRC|IRC]] to discuss your scenario - from how high your house is to how far away you are from the highsite. <font color="red"><b>Do not buy any equipment before consulting us first.</b></font> | ||
* Once we are sure you are able to connect and what equipment you should get, you can go and buy it from either [http://www.scoop.co.za Scoop] or [http://www.miro.co.za Miro]. When buying the equipment use CTWUG as the account and provide them with your nick. | * Once we are sure you are able to connect and what equipment you should get, you can go and buy it from either [http://www.scoop.co.za Scoop] or [http://www.miro.co.za Miro]. When buying the equipment use CTWUG as the account and provide them with your nick. | ||
| − | Note: The DeepSouth area (Fish Hoek, Sun Valley, Capri, Noordhoek, Kommetjie and Hout Bay) uses Ubiquiti equipment and not Mikrotik equipment. Speak to one of the admins in that area about equipment if you wish to connect in the DeepSouth. | + | Note: The DeepSouth area (Fish Hoek, Sun Valley, Capri, Noordhoek, Kommetjie and Hout Bay) uses [http://www.ubnt.com/airmax Ubiquiti] equipment and not Mikrotik equipment. Speak to one of the admins in that area about equipment if you wish to connect in the DeepSouth. |
<br /> | <br /> | ||
<br /> | <br /> | ||
Revision as of 08:33, 30 July 2013
This part of the guide is due for an update. - Beetle001
Contents
Wireless Hardware
You can be a broadcaster, client, or a client that later becomes a broadcaster. The CTWUGcommunity prefers to use Mikrotik RouterBoards. Why? I hear you ask, well most of the Wuggers feels comfortable in setting up these devices. If you decide to buy something else, which you are entitled to. Just make sure that you do have the knowledge or someone close by that knows how to operate your device.
- Come visit us on IRC to discuss your scenario - from how high your house is to how far away you are from the highsite. Do not buy any equipment before consulting us first.
- Once we are sure you are able to connect and what equipment you should get, you can go and buy it from either Scoop or Miro. When buying the equipment use CTWUG as the account and provide them with your nick.
Note: The DeepSouth area (Fish Hoek, Sun Valley, Capri, Noordhoek, Kommetjie and Hout Bay) uses Ubiquiti equipment and not Mikrotik equipment. Speak to one of the admins in that area about equipment if you wish to connect in the DeepSouth.
Concepts
We already know from the legends that we get High Sites. Those nodes are marked in Green. Then we see a node that is Blue, which is just a client. In the next section we will try to explain how to start as a client node which will allow your equipment to be transformed later into a High Site. Now why would I want to do that, huh? That answer is easy. This is the way the Wug Network expands. Becoming a broadcaster your self, ensures that the network grows so that other potential users could later join. Similar to a Daisy Chain network. The Wug strives to become a decentralized type network. The more wireless links we add the more alternative network paths we add, this is of course good for redundancy and we like that a lot!
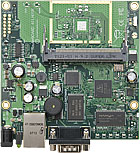
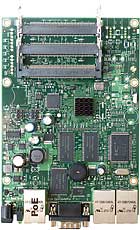
From now on we will refer the Router Board as a RB device. After staring for too long on the comparison product page of Mikrotik, you will begin to notice that there are boards with a mini pci slot. Oh, so why are we interested in those? We need a RB with a mini PCI slot to add a radio card.
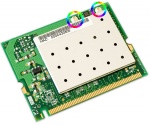
Radio card? Yes we can also refer to them as wireless cards.
Aren't they the same as the wireless cards for PCs? Yes and no. Your regular PC don't have mini-PCI slots. But what if I buy a RB 11 and plug the radio card into that and then plug the RB 11 into my PC? Ok, you win. You can use the same radio card that you plug into your RB 411 or RB 433 in your PC and use the appropriate OS drivers.
Ok Great, so are we to assume that this card slots into the mini-pci slot on the RB? Pretty much.
Now for an adapter that converts the small UFL plugs, marked in Red to a N-Type Female plug, that is marked in Blue.
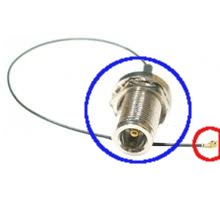
As you can see, this little contraption earned it self the nick name "pigtail". The UFL connector plugs into the radio card at the top. The radio card has two plugs, but only one can be used at the same time. But but... No you cannot use more than one antenna at the same time. Ok, so do I get to select which connector it will use? Yes, you can do that from the ROS. ROS? We'll discuss this later under configuration section.
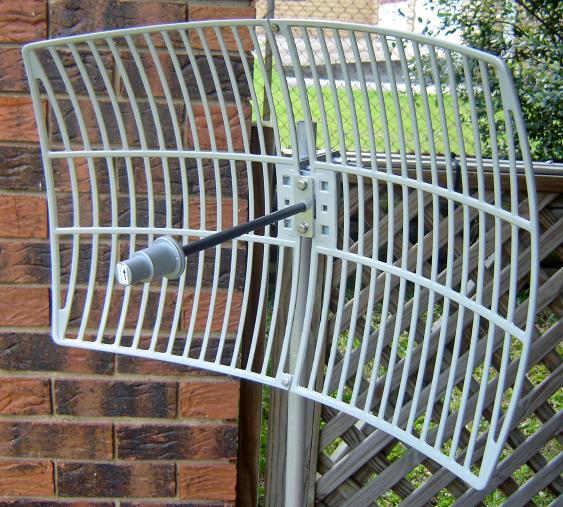
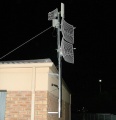
Now to something familiar, and you must have seen this on some roof tops:
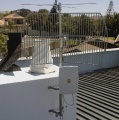
After close inspection you should notice something odd with the picture. The polarity claims to be vertically set. How come? The length of the Grid appears to be horizontal. Yes you are correct in noticing that, but if you look closer, you will see the important part of the antenna is the bit rite at the front that stick out. This is called the feed. On the feed, you will also see an arrow, that is pointing upwards. This means that the polarity is vertical, it can either be Up or Down, it doesn't matter. Horizontal alignment will be where the feed of the grid's arrow will point horizontally. So remember when assembling your Grid. The feed will always be 90' degrees aligned from the length of the Grid.
Backbones are aligned Horizontally and clients are aligned Vertically. This is important for later when you set-up your Grid.
Mikrotik Based Kits
This section is dedicated to different types of Mikrotik kits available. New users usualy gets confused as to what types of kits they should buy, we will elaborate more on what kit suites what type of node.
Kit summary:
| Name | Distance | Cost |
|---|---|---|
| Client CPE | Up to 3KM | R1300 |
| Client Node | Up to 15KM | R1500 - R1800 |
| Relay Node | Up to 15KM | R2000+ |
Client CPE
The client CPE (Client Premisis Equipment) is usually sold as one unit that includes everything. It comes with an integrated panel antenna into the enclosure and is ideal for shorter distance links like closer than 3Km.
Client Node
The client node is almost similar than the client CPE except that you have to buy everything separate and rather than a panel antenna it uses a grid antenna based on your distance from the highsite. Grid sizes for the 5.8 spectrum range from 24dbi for distance 5KM and closer, 27dbi for distance 8km and closer, and 31dbi for distances further than 8KM.
The kit should include the following:
- RB433 Routerboard
- R52 Radio
- Pigtail - UFL To N-Type Female Bulkhead
- LMR - 600mm or 1m should be fine
- 2x N-Type Male connectors - this goes onto the LMR
- POE module
- PSU
- CAT5e
- Antenna - depending on distance as mentioned above
- Enclosure
Relay Node
The relay node is the prefered node on the wug, it is used for relaying the signal further. It comes with a Routerboard capable of using 3 antennas at once. Normally a grid would be prefered for connecting to the CTWUG highsite and then panels or sectors to broadcast. Broadcasting should preferably be done on the 2.4 spectrum because users can use standard of the shelf 2.4 equipment to connect to it.
The kit should include the following:
- RB433 Routerboard
- R52 Radio - remember to add extra radio if you plan to broadcast
- Pigtail - UFL To N-Type Female Bulkhead for each interface you are running
- LMR - 600mm or 1m for each interface
- 2x N-Type Male connectors - for each interface
- POE module
- PSU
- CAT5e
- Antenna - Grid for connecting to highsite and panel or sector for broacasting.
- Enclousure
Installing your kit
Before you just stick a ladder up the wall and jump on the roof; have a think about where you would like to attach your equipment and how you need to route cables back into your house. Often sitting down and working out the distances and logistics will reveal things you had not thought about. Running the cable under the eve of the roof might sound like a simple plan, but does the slope of your roof allow you easy access to be able to route the from the inside out? Drilling through an outside wall might also take a bit more work than you think and how sure are you where the water pipes and electricity conduits travel?
Some items that might make your installation simpler
- Some good friends. Having an extra hand really helps a lot. Throw some beers in the fridge and make sure the SO keeps the snack topped up.
- A sturdy ladder
- A good drill with the correct bits. Hammer action helps. You need a masonry bit. Speak to your hardware store man.
- Marker to plot your drill points
- Hammer to knock the plugs into the wall for the bracket
- Monkey wrench, spanner or even better: a socket set. There are a few bolts to be tightened when you mount the bracket, pole and equipment.
- Cable ties to tidy things up after you install
- The obligatory side cutter when you realise you need to cut cables you tied prematurely
- Crimping tool if you intend to make your own cables on the day (try test your cable before running it to the roof)
- Another nice to have is fish tape [1]. It really makes routing cables through tight places much easier.
- Two way radios. Saves you having to drag your notebook up onto the roof. A headset with a cellphone works just a well. Besides you get to say things like: "Two more degrees to the right, over".
Bracket and Masts
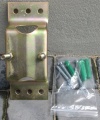
Brackets and masts come in various shapes and sizes and are made from different types of metal. The height of your mast will very much dictate the type of mast and bracket you will install.
A 38mm aluminium 2m mast can generally be installed with an economy bracket. The 50mm galvanised steel masts are more sturdy (i.e. less movement in the wind) and range from 2 - 6m. These will require a more serious bracket like a Tripod wall mount. L-Mounts are generally used for things like satellite dishes where there is very little tolerance for motion. Along with your mast and bracket you will need to purchase a U Bolt(s) to secure the mast to the bracket as well as bolts to attach the bracket to the wall. The supplier of the bracket and mast should be able to guide you as to which sizes you need. If your mast is very long or top heavy you can attach tie downs to prevent it from toppling over in high wind.
Waterproof your connectors
For continued stability and quality of your wireless link, you need to waterproof the connectors of your antenna installation.
Check the guide on how to waterproof your connectors.
Getting connected
- Once you have set up your kit on your roof its time to do a scan for the ctwug ssids.
- With the help of WIND you should have a good idea of where possible CTWUG highsites are.
- Your antenna scans in the direction that the antenna feed points to (if you are using a grid). Flat Panel antennas scans in the direction that the front flat area points to.
- Download winbox [2]
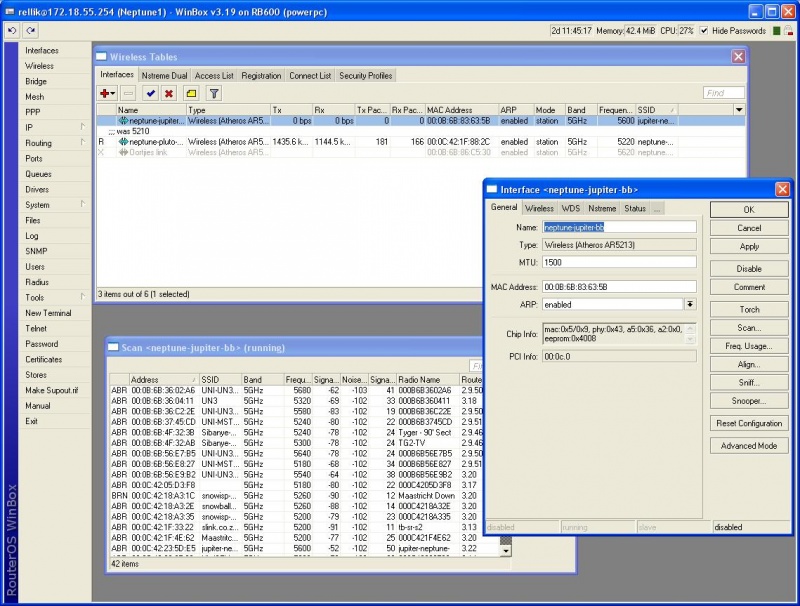
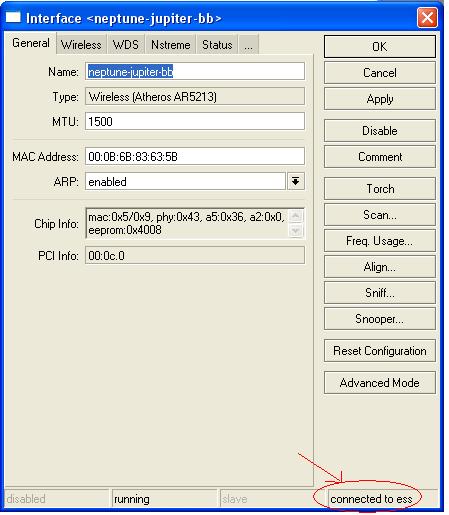
- Log into winbox and on the menu on the left click Wireless. A new window pops up. Double click your wireless interface (probably called wlan1 if you havent renamed it). Another window pops up. Click on the Scan button to begin your scan. Keep on scanning until you find the ctwug site that you want to connect to.
- You want to align your antenna to get the best signal. Click on the Connect button. The relevant's highsite details will be applied to your wlan interface. Click Close to close the scan window. Give it a couple of seconds. You will see in the bottom right of the interface window the text saying "connected to ess" That means your router has connected to the highsite. If it reads "searching for networks" you have not successfully connected to the highsite. If you have not yet given your wlan adapter's mac address to a highsite admin then you wont be seeing the "connected to ess"
- There are Minimum Requirements to join a CTWUG High Site:
- Signal less than -78dBm
- CCQ greater than 60%/60%
- Now is a good time to log onto IRC and ask an admin responsibile for that highsite to enable your mac and issue you with an ip range.
Configure your IP Address
- If you are unsure of how to add the IP addresses given to you by you HS Admin, please read the PTP Link Page under the Howto's section of the wiki.
- It is very important to register all the ip's you use on your node page on WiND. This is so that DNS hostnames are generated for your IP's. It is required. More on how to do this here: DNS Setup
Quality network Link
- Before running off, read the CTWUG_CCQ page to align your antenna for the best possible performance. Remember bad signal and bad CCQ not only gives you a bad WUG experience, it also affects other users connected to the same interface on the highsite as your are.
